{"value":"Need for Speed—No, it’s not the video game, but rather a critical requirement for the success of your website in this competitive world.\n\nAlthough we might think that subsecond delay is acceptable, the New York Times noted in [For Impatient Web Users, an Eye Blink Is Just Too Long to Wait](http://www.nytimes.com/2012/03/01/technology/impatient-web-users-flee-slow-loading-sites.html?pagewanted=all&_r=0) that humans can notice a 250-millisecond (a quarter of a second) difference between competing sites. In fact, users tend to opt out of slower websites in favor of faster ones. In the study done at Amazon, [How Webpage Load Time Is Related to Visitor Loss](http://pearanalytics.com/blog/2009/how-webpage-load-time-related-to-visitor-loss/), it’s revealed that for every 100-millisecond (one-tenth of a second) increase in load time, sales decrease 1%.\n\nIf someone wants data, you can deliver that data much faster if it’s cached. That’s true whether it’s for a webpage or a report that drives business decisions. Can your business afford to not cache your webpages so as to deliver them with the shortest latency possible?\n\nOf course, content delivery networks like [Amazon CloudFront](https://aws.amazon.com/cloudfront/) can cache part of your website’s content, for example static objects like images, CSS files, and HTML files. However, dynamic data (for example, the product catalog of an e-commerce website) typically resides in a database. So we have to look at caching for databases as well.\n\n[Amazon ElastiCache](https://aws.amazon.com/elasticache/) is a fully managed, in-memory caching service supporting flexible, real-time use cases. You can use ElastiCache to accelerate application and database performance, or as a primary data store for use cases that don’t require durability like session stores, gaming leaderboards, streaming, and analytics. ElastiCache is compatible with Redis and Memcached.\n\nIn this post, we show you how to deploy [Amazon ElastiCache for Redis](https://aws.amazon.com/elasticache/redis/) using [AWS Cloud Development Kit](https://aws.amazon.com/cdk/) (AWS CDK). The AWS CDK is an open-source software development framework to define your cloud application resources using familiar programming languages like Python.\n\n#### **Solution overview**\n\nWe host our web application using [Amazon Elastic Compute Cloud](https://aws.amazon.com/ec2/) (Amazon EC2). We load a large dataset into a MySQL database hosted on [Amazon Relational Database Service](https://aws.amazon.com/rds/) (Amazon RDS). To cache queries, we use ElastiCache for Redis. The following architecture diagram shows the solution components and how they interact.\n\nThe application queries data from both the [Amazon RDS for MySQL](https://aws.amazon.com/rds/mysql/) database and ElastiCache, showing you the respective runtime. The following diagram illustrates this process.\n\n\n\nIn this post, we walk you through the following steps:\n\n1. Install the [AWS Command Line Interface](http://aws.amazon.com/cli) (AWS CLI) and [AWS CDK v2](https://docs.aws.amazon.com/cdk/v2/guide/getting_started.html) on your local machine.\n2. Clone and set up the AWS CDK application.\n3. Run the AWS CDK application.\n4. Verify the resources created.\n5. Connect to the web server EC2 instance.\n6. Start the web application.\n7. Use the web application.\n\nSo, let’s begin.\n\n#### **Prerequisites**\n\nYou should have the following prerequisites:\n\n- An [AWS account](https://console.aws.amazon.com/console/home?nc2=h_ct&src=header-signin)\n- [AWS CLI v2](https://docs.aws.amazon.com/cli/latest/userguide/install-cliv2.html)\n- Python 3.6 or later\n- node.js 14.x or later\n- [AWS CDK v2](https://docs.aws.amazon.com/cdk/v2/guide/getting_started.html)\n\nThe estimated cost to complete this post is $3, assuming you leave the resources running for 8 hours. Make sure you delete the resources you create in this post to avoid ongoing charges.\n\n#### **Install the AWS CLI and AWS CDK on your local machine**\n\nIf you do not have AWS CLI already on your local machine, install it using this [install guide](https://docs.aws.amazon.com/cli/latest/userguide/getting-started-install.html) and configure using this [configuration guide](https://docs.aws.amazon.com/cli/latest/userguide/cli-chap-configure.html).\n\nInstall the AWS CDK Toolkit globally using the following node package manager command:\n\n```\n$ npm install -g aws-cdk-lib@latest\n```\n\nRun the following command to verify the correct installation and print the version number of AWS CDK:\n\n```\n$ cdk --version\n```\n\n#### **Clone and set up the AWS CDK application**\n\nOn your local machine, clone the AWS CDK application with the following command:\n\n```\n$ git clone https://github.com/aws-samples/amazon-elasticache-demo-using-aws-cdk.git\n```\n\nBefore we deploy the application, let’s review the directory structure:\n\n```\n├── CODE_OF_CONDUCT.md\n├── CONTRIBUTING.md\n├── LICENSE\n├── README.md\n├── app.py\n├── cdk.json\n├── elasticache_demo_cdk_app\n│ ├── __init__.py\n│ ├── elasticache_demo_cdk_app_stack.py\n│ └── user_data.sh\n├── images\n│ ├── ...\n├── requirements-dev.txt\n├── requirements.txt\n├── source.bat\n└── web-app\n ├── cacheLib.py\n ├── configs.json\n ├── static\n │ ├── ...\n ├── templates\n │ ├── ...\n └── webApp.py\n```\n\nThe repository also contains the web application located under the subfolder ```web-app```, which is installed on an EC2 instance at deployment.\n\nThe ```cdk.json``` file tells the AWS CDK Toolkit how to run your app.\n\n#### **Set up the virtual environment**\n\nThis project is set up like a standard Python project. Create a Python virtual environment using the following code:\n\n```\n$ python3 -m venv .venv\n```\n\nUse the following step to activate the virtual environment:\n\n```\n$ source .venv/bin/activate\n```\n\nIf you’re on a Windows platform, activate the virtual environment as follows:\n\n```\n% .venv\\Scripts\\activate.bat\n```\n\nAfter the virtual environment is activated, upgrade pip to the latest version:\n\n```\n$ python3 -m pip install --upgrade pip\n```\n\nInstall the required dependencies:\n\n```\n$ pip install -r requirements.txt\n```\n\nBefore you deploy any AWS CDK application, you need to bootstrap a space in your account and the Region you’re deploying into. To bootstrap in your default Region, issue the following command:\n\n```\n$ cdk bootstrap\n```\n\nTo deploy into a specific account and Region, issue the following command, providing your account number and Region:\n\n```\n$ cdk bootstrap aws://ACCOUNT-NUMBER/REGION\n```\n\nFor more information about this setup, visit [Getting started with the AWS CDK](https://docs.aws.amazon.com/cdk/latest/guide/getting_started.html).\n\nYou can now synthesize the [AWS CloudFormation](https://aws.amazon.com/cloudformation/) template for this AWS CDK application:\n\n```\n$ cdk synth\n```\n\nTo add additional dependencies, for example other AWS CDK libraries, just add them to your setup.py file and rerun the ```pip install -r requirements.txt``` command.\n\n#### **Other useful AWS CDK commands**\n\nThe following AWS CDK commands might also be useful:\n\n- cdk ls – List all stacks in the app\n- cdk synth – Emit the synthesized CloudFormation template\n- cdk deploy – Deploy this stack to your default AWS account or Region\n- cdk diff – Compare the deployed stack with the current state\n- cdk docs – Open the AWS CDK documentation\n\n#### **Run the AWS CDK application**\n\nAt this point, you can deploy the AWS CDK application:\n\n```\n$ cdk deploy\n```\n\nYou should see a list of AWS resources that will be provisioned in the stack. Enter ‘y’ to proceed with the deployment.\n\n\n\nYou can see the progress of the deployment on the terminal. It takes around 10 to 15 minutes to deploy the stack.\n\n\n\nOnce deployment is complete, you can see the total deployment time and AWS CloudFormation Outputs on the terminal. Take note of the web server public URL.\n\n\n\nThese outputs are also available on the AWS console. Navigate to the AWS CloudFormation console and choose the ```ElasticacheDemoCdkAppStack``` stack to see the details.\n\n\n\nReview the resources under the **Outputs** tab.\n\n\n\nThe web application retrieves these configurations automatically. However, take note of the web server public IP or URL. We need it to connect to the web server later.\n\n#### **AWS CDK application code**\n\nThe main AWS CDK application is in the app stack file, [elasticache_demo_cdk_app_stack.py](https://github.com/aws-samples/amazon-elasticache-demo-using-aws-cdk/blob/main/elasticache_demo_cdk_app/elasticache_demo_cdk_app_stack.py), and the whole infrastructure is defined as the ```ElasticacheDemoCdkAppStack``` class. Read through the comments to see what each block is doing.\n\nFirst, we import the necessary libraries needed to construct the stack:\n\n```\nfrom aws_cdk import (\n # Duration,\n Stack,\n aws_rds as rds,\n aws_ec2 as ec2,\n aws_iam as iam,\n aws_elasticache as elasticache,\n RemovalPolicy,\n CfnOutput\n)\n\nfrom constructs import Construct\n```\n\nThen in the class ```ElasticacheDemoCdkAppStack```, we define the stack, starting with the virtual private network and security groups:\n\n```\nclass ElasticacheDemoCdkAppStack(Stack):\n\n def __init__(self, scope: Construct, construct_id: str, **kwargs) -> None:\n super().__init__(scope, construct_id, **kwargs)\n\n # VPC \n vpc = ec2.Vpc(self, \"VPC\",\n nat_gateways=1,\n cidr=\"10.0.0.0/16\",\n subnet_configuration=[\n ec2.SubnetConfiguration(name=\"public\",subnet_type=ec2.SubnetType.PUBLIC,cidr_mask=24),\n ec2.SubnetConfiguration(name=\"private\",subnet_type=ec2.SubnetType.PRIVATE_WITH_NAT,cidr_mask=24)\n ]\n )\n\n\n # Security Groups\n db_sec_group = ec2.SecurityGroup(\n self, \"db-sec-group\",security_group_name=\"db-sec-group\", vpc=vpc, allow_all_outbound=True,\n )\n webserver_sec_group = ec2.SecurityGroup(\n self, \"webserver_sec_group\",security_group_name=\"webserver_sec_group\", vpc=vpc, allow_all_outbound=True,\n )\n redis_sec_group = ec2.SecurityGroup(\n self, \"redis-sec-group\",security_group_name=\"redis-sec-group\", vpc=vpc, allow_all_outbound=True,\n ) \n\n private_subnets_ids = [ps.subnet_id for ps in vpc.private_subnets]\n\n redis_subnet_group = elasticache.CfnSubnetGroup(\n scope=self,\n id=\"redis_subnet_group\",\n subnet_ids=private_subnets_ids, # todo: add list of subnet ids here\n description=\"subnet group for redis\"\n )\n\n # Add ingress rules to security group\n webserver_sec_group.add_ingress_rule( \n peer=ec2.Peer.ipv4(\"0.0.0.0/0\"),\n description=\"Flask Application\",\n connection=ec2.Port.tcp(app_port),\n )\n\n db_sec_group.add_ingress_rule( \n peer=webserver_sec_group,\n description=\"Allow MySQL connection\",\n connection=ec2.Port.tcp(3306),\n )\n\n redis_sec_group.add_ingress_rule(\n peer=webserver_sec_group,\n description=\"Allow Redis connection\",\n connection=ec2.Port.tcp(6379), \n )\n```\n\nThen we define the data stores used in the application, that is, Amazon RDS for MySQL and ElastiCache:\n\n```\n# RDS MySQL Database\n rds_instance = rds.DatabaseInstance(\n self, id='RDS-MySQL-Demo-DB',\n database_name='covid',\n engine=rds.DatabaseInstanceEngine.mysql(\n version=rds.MysqlEngineVersion.VER_8_0_23\n ),\n vpc=vpc,\n port=3306,\n instance_type= ec2.InstanceType.of(\n ec2.InstanceClass.BURSTABLE3,\n ec2.InstanceSize.MEDIUM,\n ),\n removal_policy=RemovalPolicy.DESTROY,\n deletion_protection=False,\n iam_authentication=True,\n security_groups=[db_sec_group],\n storage_encrypted=True,\n vpc_subnets=ec2.SubnetSelection(subnet_type=ec2.SubnetType.PRIVATE_WITH_NAT)\n )\n\n # Elasticache for Redis cluster\n redis_cluster = elasticache.CfnCacheCluster(\n scope=self,\n id=\"redis_cluster\",\n engine=\"redis\",\n cache_node_type=\"cache.t3.small\",\n num_cache_nodes=1,\n cache_subnet_group_name=redis_subnet_group.ref,\n vpc_security_group_ids=[redis_sec_group.security_group_id],\n ) \n```\n\nThen we define the EC2 instance for the web server as well as the required [AWS Identity and Access Management](http://aws.amazon.com/iam) (IAM) role and policies for the web server to access the data stores and [AWS Secrets Manager](https://aws.amazon.com/secrets-manager/) to retrieve the database credentials:\n\n```\n# AMI definition\n amzn_linux = ec2.MachineImage.latest_amazon_linux(\n generation=ec2.AmazonLinuxGeneration.AMAZON_LINUX_2,\n edition=ec2.AmazonLinuxEdition.STANDARD,\n virtualization=ec2.AmazonLinuxVirt.HVM,\n storage=ec2.AmazonLinuxStorage.GENERAL_PURPOSE\n )\n\n # Instance Role and SSM Managed Policy\n role = iam.Role(self, \"ElasticacheDemoInstancePolicy\", assumed_by=iam.ServicePrincipal(\"ec2.amazonaws.com\"))\n role.add_managed_policy(iam.ManagedPolicy.from_aws_managed_policy_name(\"AmazonSSMManagedInstanceCore\")) \n role.add_managed_policy(iam.ManagedPolicy.from_aws_managed_policy_name(\"AWSCloudFormationReadOnlyAccess\")) \n \n # The following inline policy makes sure we allow only retrieving the secret value, provided the secret is already known. \n # It does not allow listing of all secrets.\n role.attach_inline_policy(iam.Policy(self, \"secret-read-only\", \n statements=[iam.PolicyStatement(\n actions=[\"secretsmanager:GetSecretValue\"],\n resources=[\"arn:aws:secretsmanager:*\"],\n effect=iam.Effect.ALLOW\n )]\n )) \n\n # EC2 Instance for Web Server\n instance = ec2.Instance(self, \"WebServer\",\n instance_type=ec2.InstanceType(\"t3.small\"),\n machine_image=amzn_linux,\n vpc = vpc,\n role = role,\n vpc_subnets=ec2.SubnetSelection(subnet_type=ec2.SubnetType.PUBLIC),\n security_group=webserver_sec_group,\n user_data=ec2.UserData.custom(user_data)\n ) \n```\n\nLastly, we capture all CloudFormation stack outputs generated from the AWS CDK application stack:\n\n```\n # Generate CloudFormation Outputs\n CfnOutput(scope=self,id=\"secret_name\",value=rds_instance.secret.secret_name)\n CfnOutput(scope=self,id=\"mysql_endpoint\",value=rds_instance.db_instance_endpoint_address)\n CfnOutput(scope=self,id=\"redis_endpoint\",value=redis_cluster.attr_redis_endpoint_address)\n CfnOutput(scope=self,id=\"webserver_public_ip\",value=instance.instance_public_ip)\n CfnOutput(scope=self,id=\"webserver_public_url\",value='http://' + instance.instance_public_dns_name + ':' + str(app_port))\n```\n\nAs described in the preceding code, the web server ```userdata``` is stored in the [user_data.sh](https://github.com/aws-samples/amazon-elasticache-demo-using-aws-cdk/blob/main/elasticache_demo_cdk_app/user_data.sh) file. The content of ```user_data.sh``` is as follows:\n\n```\n#!/usr/bin/sh\n\nyum update -y\nyum install mariadb -y\nyum install git -y\nyum install tree -y\nyum install wget -y\nyum install jq -y\n\npip3 install flask redis pymysql boto3 requests\n\ncd /home/ec2-user\ngit clone https://github.com/aws-samples/amazon-elasticache-demo-using-aws-cdk.git\ncd amazon-elasticache-demo-using-aws-cdk\nwget https://aws-blogs-artifacts-public.s3.amazonaws.com/artifacts/DBBLOG-1922/sample-dataset.zip\nunzip sample-dataset.zip\nrm sample-dataset.zip\n\nchown -R ec2-user:ec2-user /home/ec2-user/*\n```\n\nThe web server essentially clones the same Git repository of the main AWS CDK application. The script also downloads a sample dataset from located under the subfolder sample-data under the main folder. The dataset is from [Kaggle](https://www.kaggle.com/charlieharper/spatial-data-for-cord19-covid19-ordc/version/2) and is licensed under [Creative Commons](https://creativecommons.org/licenses/by/4.0/).\n\n#### **Verify the resources created by AWS CDK**\n\nOn the Amazon EC2 console, verify if the EC2 instance was created and is running.\n\n\n\nOn the Amazon RDS console, verify if the MySQL instance was created and is available.\n\n\n\nOn the ElastiCache console, verify if the Redis cluster is available.\n\n\n\nThe Amazon RDS CDK construct also automatically creates a secret in Secrets Manager. You can view the secret name in the CloudFormation stack outputs. The secret contains the MySQL user admin, automatically generated password, database host, and database name.\n\nThe web application retrieves this information automatically from Secrets Manager, so you don’t need to note down these values.\n\n#### **Connect to the web server EC2 instance**\n\nWe connect to the web server instance using [AWS Systems Manager Session Manager](https://docs.aws.amazon.com/systems-manager/latest/userguide/session-manager.html) through the [AWS Management Console](http://aws.amazon.com/console). Leaving inbound SSH ports and remote PowerShell ports open on your managed nodes greatly increases the risk of entities running unauthorized or malicious commands on the managed nodes. Session Manager helps you improve your security posture by letting you close these inbound ports, freeing you from managing SSH keys and certificates, bastion hosts, and jump boxes.\n\n1. On the Amazon EC2 console, choose **Instances** in the navigation pane.\n2. Select the web server and choose **Connect**.\n\n\n\n3. On the **Session Manager** tab, choose **Connect**.\n\n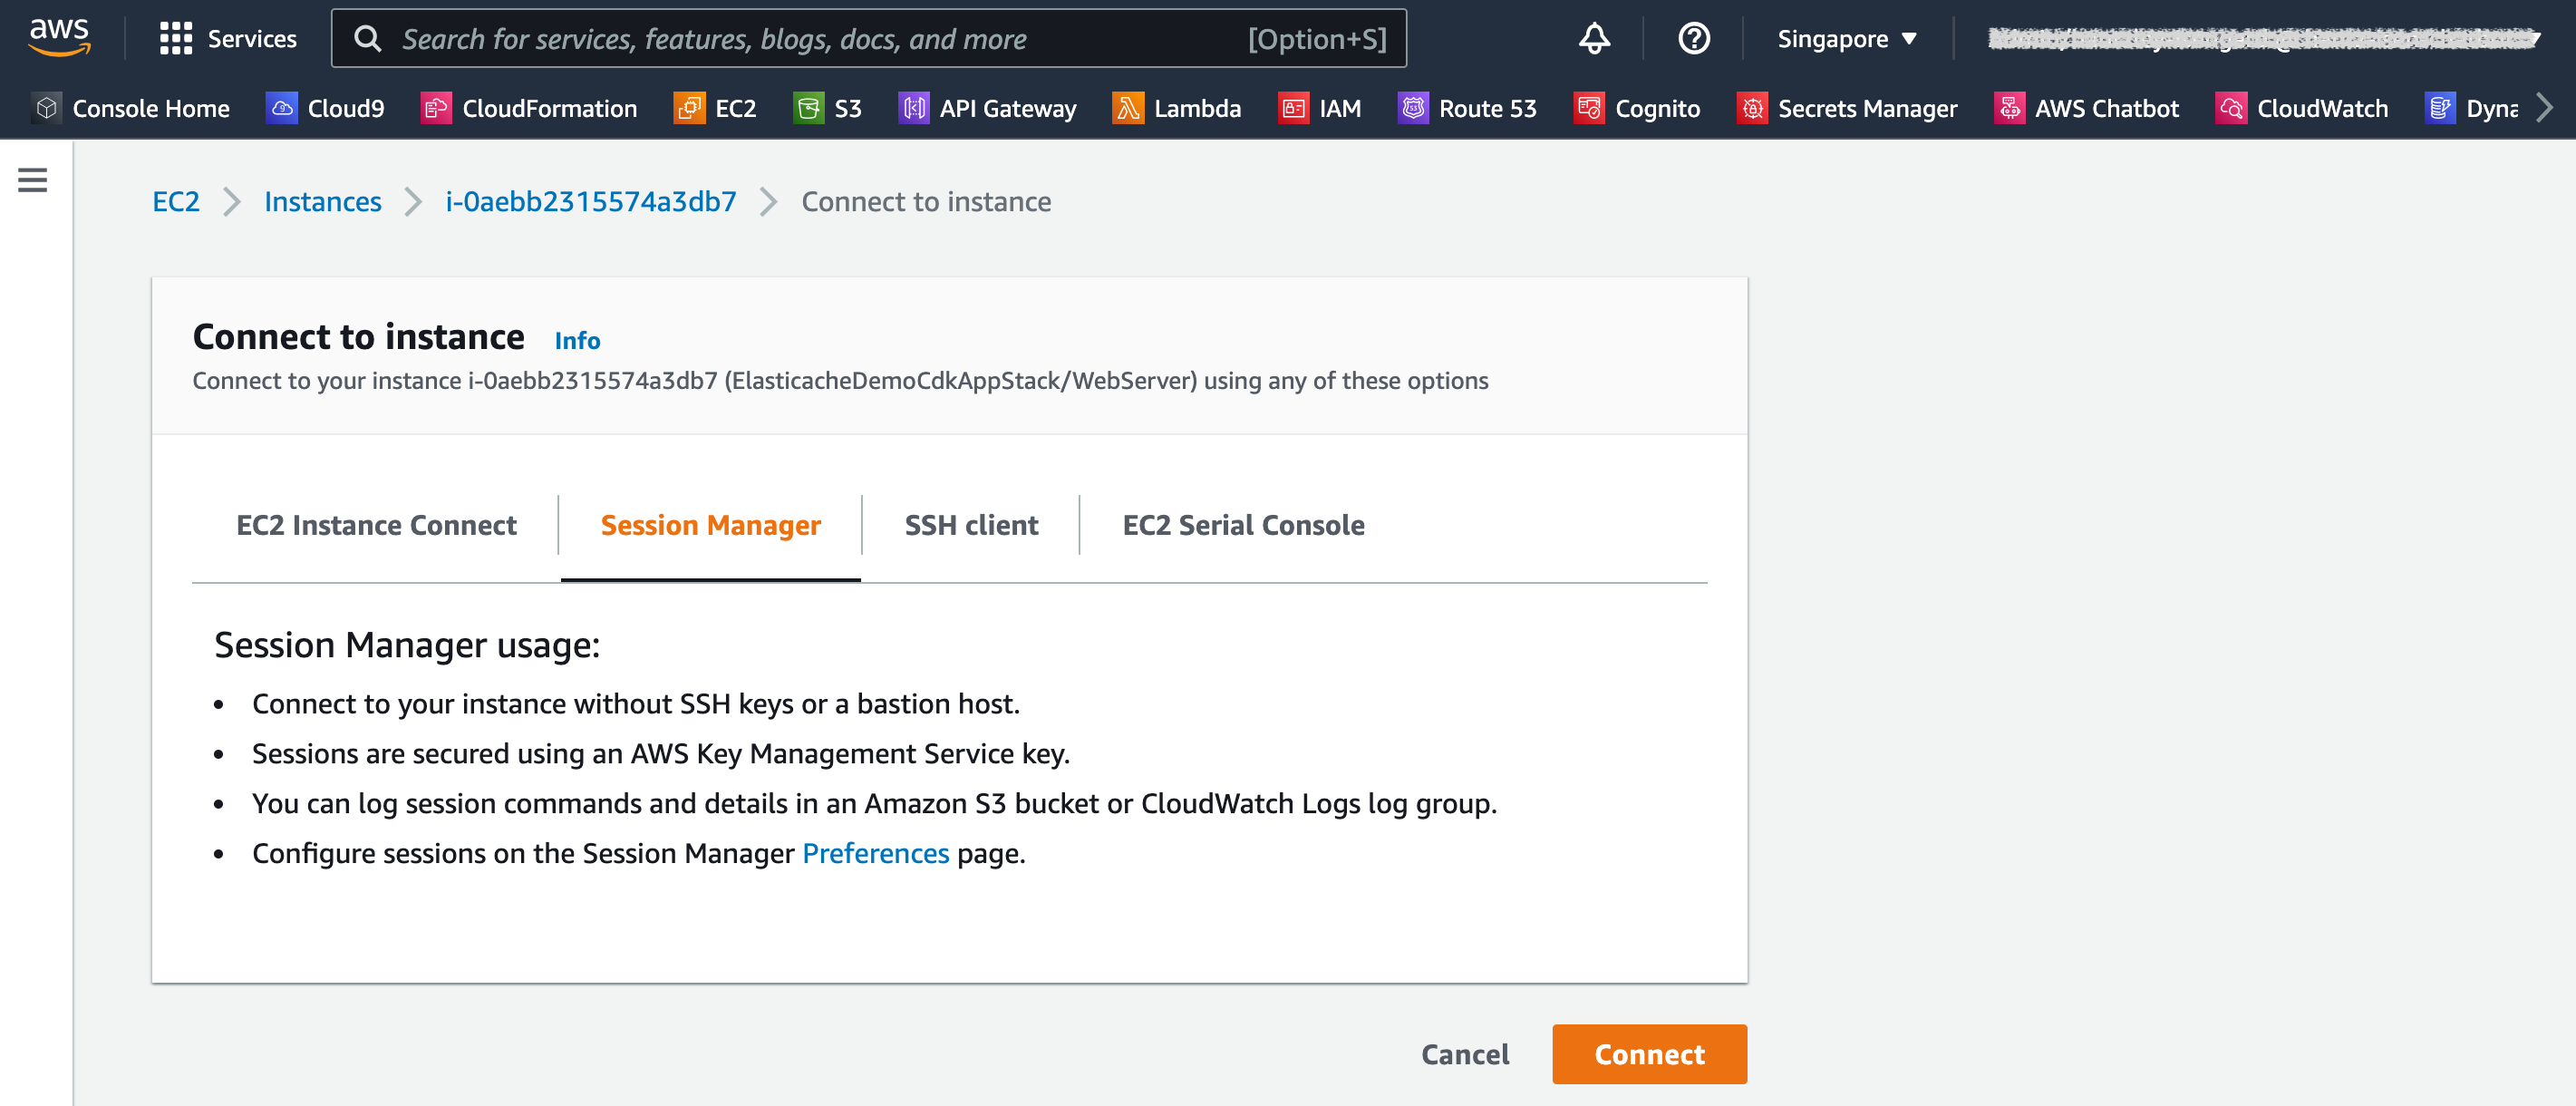\n\nYou log in as ```ssm-user```. However, the web server’s user data script is run for ```ec2-user```.\n\n4. Switch to ```ec2-user``` using the following command:\n\n```\n$ sudo su - ec2-user\n```\n\nYou should land in the ```ec2-user``` home directory ```/home/ec2-user```, which should contain the ```elasticache-demo-cdk-application``` subfolder. This the same repository that you cloned on your local machine. It contains the sample data that is inserted into the MySQL database as well as the web application. You can find the sample dataset and the web application in the ```sample-dataset``` and ```web-app``` subfolders, respectively.\n\nLet’s navigate to the web application subfolder from the home directory and see the content:\n\n```\n$ ls -l \n$ cd amazon-elasticache-demo-using-aws-cdk\n$ ls -l \n$ cd web-app \n$ ls -l\n```\n\n\n\n#### **Overview of the web application**\n\nThe web application is a Python [Flask](https://www.fullstackpython.com/flask.html) application. The file [webApp.py](https://github.com/aws-samples/amazon-elasticache-demo-using-aws-cdk/blob/main/web-app/webApp.py) is the main application, which contains the Flask routes for each operation, for example, query MySQL database and query cache. Refer to the following ```webApp.py``` code:\n\n```\n#!/usr/bin/env python3\n# -*- coding: utf-8 -*-\n\nimport json\nfrom datetime import datetime\nfrom flask import Flask, render_template\n\nfrom cacheLib import *\n\napp = Flask(__name__)\n\n\n############################### Flask Routes #################################\n\n@app.route(\"/\")\ndef index():\n return render_template('index.html', rows=max_rows, sql=sql)\n\n@app.route(\"/query_mysql\")\ndef query_mysql_endpoint():\n start_time = datetime.now()\n data = query_mysql(sql,configs['db_host'], configs['db_username'], configs['db_password'], configs['db_name'])\n delta = (datetime.now() - start_time).total_seconds()\n return render_template('query_mysql.html', delta=delta, data=data, sql=sql, fields=db_tbl_fields)\n\n@app.route(\"/query_cache\")\ndef query_cache_endpoint():\n data = None \n start_time = datetime.now()\n result = query_mysql_and_cache(sql,configs['db_host'], configs['db_username'], configs['db_password'], configs['db_name'])\n delta = (datetime.now() - start_time).total_seconds() \n\n if isinstance(result['data'], list):\n data = result['data']\n else:\n data = json.loads(result['data'])\n\n return render_template('query_cache.html', delta=delta, data=data, records_in_cache=result['records_in_cache'], \n TTL=Cache.ttl(sql), sql=sql, fields=db_tbl_fields)\n\n@app.route(\"/delete_cache\")\ndef delete_cache_endpoint():\n flush_cache()\n return render_template('delete_cache.html') \n\nif __name__ == \"__main__\":\n app.run(debug=False, use_reloader=False, host='0.0.0.0', port=app_port) \n```\n\nThe ```webApp.py``` file imports ```cacheLib```. The file cacheLib.py contains the key procedures to perform the following actions:\n\n- Retrieve the MySQL and ElastiCache for Redis endpoints from the CloudFormation stack outputs\n- Load the sample data into the MySQL database\n- Store all configurations in ```config.json```, which is automatically created when the application is run for the first time\n- Query the MySQL database\n- Query ElastiCache\n\nRefer to the [cacheLib.py](https://github.com/aws-samples/amazon-elasticache-demo-using-aws-cdk/blob/main/web-app/cacheLib.py) file to understand the respective functions. One of these functions is called ```query_mysql_and_cache```, which is triggered by the web application under ```@app.route (\"/query_cache\"```). This function checks if the dataset is in the cache first. If there is a cache hit, the dataset is served by ElastiCache at low latency. Otherwise, the dataset is retrieved from MySQL and then cached into ElastiCache for future queries. The following is the ```query_mysql_and_cache``` code snippet:\n\n```\ndef query_mysql_and_cache(sql,db_host, db_username, db_password, db_name):\n '''\n This function retrieves records from the cache if it exists, or else gets it from the MySQL database.\n ''' \n\n res = Cache.get(sql)\n\n if res:\n print ('Records in cache...')\n return ({'records_in_cache': True, 'data' : res})\n \n res = mysql_fetch_data(sql, db_host, db_username, db_password, db_name)\n \n if res:\n print ('Cache was empty. Now populating cache...') \n Cache.setex(sql, ttl, json.dumps(res))\n return ({'records_in_cache': False, 'data' : res})\n else:\n return None\n```\n\n#### **Start the web application**\n\nThe necessary runtimes and modules were already installed at instance creation using the ```userdata``` contained in the ```user_data.sh``` file in the AWS CDK application.\n\nLet’s start the web application with the following command:\n\n```\n$ python3 webApp.py\n```\n\n\n\n#### **Use the web application**\n\nFrom a browser, access the web server’s public IP address or URL with port 8008 (or any other ports if you changed it), for example, ```http://WEBSERVER-PUBLIC-IP:8008```. This should take you to the landing page of the web application, as shown in the following screenshot.\n\n\n\nIf you cannot access the site using port 8008, you can be behind a VPN or firewall that is blocking that port. Try disconnecting your VPN or switching network.\n\nNow let’s query the MySQL database. Choose **Query MySQL** on the navigation bar.\n\n\n\nYou can review the time it took to run the query. Now let’s try to query the cache by choosing **Query Cache**.\n\n\n\nNotice that it took almost the same time to run. This is because the first time you access the Redis cache, it’s empty. So the application gets the data from the MySQL database and then caches it into the Redis cache.\n\nNow, try querying the cache again and observe the new runtime. You should see a value in the order of milliseconds. This is very fast!\n\n\n\nIf you look at your terminal, you can see the HTTP requests made from the browser. This can be helpful if you need to troubleshoot.\n\n```\n[ec2-user@ip-10-0-0-96 web-app]$ python3 webApp.py\nLocal config file found...Initializing MySQL Database...\n * Serving Flask app 'webApp' (lazy loading)\n * Environment: production\n WARNING: This is a development server. Do not use it in a production deployment.\n Use a production WSGI server instead.\n * Debug mode: off * Running on all addresses (0.0.0.0)\n WARNING: This is a development server. Do not use it in a production deployment. * Running on http://127.0.0.1:8008\n * Running on http://10.0.0.96:8008 (Press CTRL+C to quit)\n151.192.221.101 - - [14/Apr/2022 16:36:41] \"GET / HTTP/1.1\" 200 -\n151.192.221.101 - - [14/Apr/2022 16:36:41] \"GET /static/css/custom.css HTTP/1.1\" 200 -151.192.221.101 - - [14/Apr/2022 16:36:41] \"GET /static/img/redis.png HTTP/1.1\" 200 -\n151.192.221.101 - - [14/Apr/2022 16:36:42] \"GET /favicon.ico HTTP/1.1\" 404 -\nCache was empty. Now populating cache...151.192.221.101 - - [14/Apr/2022 16:36:46] \"GET /query_cache HTTP/1.1\" 200 -\n151.192.221.101 - - [14/Apr/2022 16:36:46] \"GET /static/css/custom.css HTTP/1.1\" 304 -151.192.221.101 - - [14/Apr/2022 16:36:46] \"GET /static/img/redis.png HTTP/1.1\" 304 -\nRecords in cache...151.192.221.101 - - [14/Apr/2022 16:36:47] \"GET /query_cache HTTP/1.1\" 200 -\n151.192.221.101 - - [14/Apr/2022 16:36:47] \"GET /static/css/custom.css HTTP/1.1\" 304 -151.192.221.101 - - [14/Apr/2022 16:36:47] \"GET /static/img/redis.png HTTP/1.1\" 304 -\nRecords in cache...\n151.192.221.101 - - [14/Apr/2022 16:36:49] \"GET /query_cache HTTP/1.1\" 200 -\n151.192.221.101 - - [14/Apr/2022 16:36:49] \"GET /static/css/custom.css HTTP/1.1\" 304 -\n151.192.221.101 - - [14/Apr/2022 16:36:49] \"GET /static/img/redis.png HTTP/1.1\" 304 -\nRecords in database...\n```\n\n#### **Clean up**\n\nTo avoid unnecessary cost, clean up all the infrastructure created with the following command on your workstation:\n\n```\n(.venv) [~/amazon-elasticache-demo-using-aws-cdk] $ cdk destroy\nAre you sure you want to delete: ElasticacheDemoCdkAppStack (y/n)? y\nElasticacheDemoCdkAppStack: destroying...\n\n\n ✅ ElasticacheDemoCdkAppStack: destroyed \n```\n\n#### **Conclusion**\n\nAs demonstrated in this post, you can use AWS CDK to create the infrastructure for an Amazon ElastiCache application. We showed the difference in runtime between ElastiCache and an Amazon RDS with MySQL engine. You can now build your own infrastructure and application using the caching capability of Amazon ElastiCache to accelerate performance for a better user experience.\n\nWe invite you to test the solution and contribute to the project on [GitHub](https://github.com/aws-samples/amazon-elasticache-demo-using-aws-cdk/). Share your thoughts on this tutorial, in the comments below!\n\n#### **License summary**\n\nThis [sample code](https://github.com/aws-samples/amazon-elasticache-demo-using-aws-cdk/) is made available under a modified MIT license. See the LICENSE file for more information.\n\n#### **About the Authors**\n\n\n\n**Hantzley Tauckoor** is an APJ Partner Solutions Architecture Leader based in Singapore. He has 20 years’ experience in the ICT industry spanning multiple functional areas, including solutions architecture, business development, sales strategy, consulting, and leadership. He leads a team of Senior Solutions Architects that enable partners to develop joint solutions, build technical capabilities, and steer them through the execution phase as customers migrate and modernize their applications to AWS. Outside work, he enjoys spending time with his family, watching movies, and hiking.\n\n\n\n**Calvin Ngo** is a Senior Specialist Solutions Architect in the Developer Acceleration team at AWS. His mission is to help developers adopt cloud technologies and refactoring systems and applications using modern development techniques. He does this by taking a cross-functional, coordinated approach to developer enablement. In his spare time, he likes taking his kids for a bike ride around Singapore and also kayaking to nearby islands.","render":"<p>Need for Speed—No, it’s not the video game, but rather a critical requirement for the success of your website in this competitive world.</p>\n<p>Although we might think that subsecond delay is acceptable, the New York Times noted in <a href=\"http://www.nytimes.com/2012/03/01/technology/impatient-web-users-flee-slow-loading-sites.html?pagewanted=all&_r=0\" target=\"_blank\">For Impatient Web Users, an Eye Blink Is Just Too Long to Wait</a> that humans can notice a 250-millisecond (a quarter of a second) difference between competing sites. In fact, users tend to opt out of slower websites in favor of faster ones. In the study done at Amazon, <a href=\"http://pearanalytics.com/blog/2009/how-webpage-load-time-related-to-visitor-loss/\" target=\"_blank\">How Webpage Load Time Is Related to Visitor Loss</a>, it’s revealed that for every 100-millisecond (one-tenth of a second) increase in load time, sales decrease 1%.</p>\n<p>If someone wants data, you can deliver that data much faster if it’s cached. That’s true whether it’s for a webpage or a report that drives business decisions. Can your business afford to not cache your webpages so as to deliver them with the shortest latency possible?</p>\n<p>Of course, content delivery networks like <a href=\"https://aws.amazon.com/cloudfront/\" target=\"_blank\">Amazon CloudFront</a> can cache part of your website’s content, for example static objects like images, CSS files, and HTML files. However, dynamic data (for example, the product catalog of an e-commerce website) typically resides in a database. So we have to look at caching for databases as well.</p>\n<p><a href=\"https://aws.amazon.com/elasticache/\" target=\"_blank\">Amazon ElastiCache</a> is a fully managed, in-memory caching service supporting flexible, real-time use cases. You can use ElastiCache to accelerate application and database performance, or as a primary data store for use cases that don’t require durability like session stores, gaming leaderboards, streaming, and analytics. ElastiCache is compatible with Redis and Memcached.</p>\n<p>In this post, we show you how to deploy <a href=\"https://aws.amazon.com/elasticache/redis/\" target=\"_blank\">Amazon ElastiCache for Redis</a> using <a href=\"https://aws.amazon.com/cdk/\" target=\"_blank\">AWS Cloud Development Kit</a> (AWS CDK). The AWS CDK is an open-source software development framework to define your cloud application resources using familiar programming languages like Python.</p>\n<h4><a id=\"Solution_overview_12\"></a><strong>Solution overview</strong></h4>\n<p>We host our web application using <a href=\"https://aws.amazon.com/ec2/\" target=\"_blank\">Amazon Elastic Compute Cloud</a> (Amazon EC2). We load a large dataset into a MySQL database hosted on <a href=\"https://aws.amazon.com/rds/\" target=\"_blank\">Amazon Relational Database Service</a> (Amazon RDS). To cache queries, we use ElastiCache for Redis. The following architecture diagram shows the solution components and how they interact.</p>\n<p>The application queries data from both the <a href=\"https://aws.amazon.com/rds/mysql/\" target=\"_blank\">Amazon RDS for MySQL</a> database and ElastiCache, showing you the respective runtime. The following diagram illustrates this process.</p>\n<p><img src=\"https://dev-media.amazoncloud.cn/7a3bd147267d4d868c8bb094b545767c_image.png\" alt=\"image.png\" /></p>\n<p>In this post, we walk you through the following steps:</p>\n<ol>\n<li>Install the <a href=\"http://aws.amazon.com/cli\" target=\"_blank\">AWS Command Line Interface</a> (AWS CLI) and <a href=\"https://docs.aws.amazon.com/cdk/v2/guide/getting_started.html\" target=\"_blank\">AWS CDK v2</a> on your local machine.</li>\n<li>Clone and set up the AWS CDK application.</li>\n<li>Run the AWS CDK application.</li>\n<li>Verify the resources created.</li>\n<li>Connect to the web server EC2 instance.</li>\n<li>Start the web application.</li>\n<li>Use the web application.</li>\n</ol>\n<p>So, let’s begin.</p>\n<h4><a id=\"Prerequisites_32\"></a><strong>Prerequisites</strong></h4>\n<p>You should have the following prerequisites:</p>\n<ul>\n<li>An <a href=\"https://console.aws.amazon.com/console/home?nc2=h_ct&src=header-signin\" target=\"_blank\">AWS account</a></li>\n<li><a href=\"https://docs.aws.amazon.com/cli/latest/userguide/install-cliv2.html\" target=\"_blank\">AWS CLI v2</a></li>\n<li>Python 3.6 or later</li>\n<li>node.js 14.x or later</li>\n<li><a href=\"https://docs.aws.amazon.com/cdk/v2/guide/getting_started.html\" target=\"_blank\">AWS CDK v2</a></li>\n</ul>\n<p>The estimated cost to complete this post is $3, assuming you leave the resources running for 8 hours. Make sure you delete the resources you create in this post to avoid ongoing charges.</p>\n<h4><a id=\"Install_the_AWS_CLI_and_AWS_CDK_on_your_local_machine_44\"></a><strong>Install the AWS CLI and AWS CDK on your local machine</strong></h4>\n<p>If you do not have AWS CLI already on your local machine, install it using this <a href=\"https://docs.aws.amazon.com/cli/latest/userguide/getting-started-install.html\" target=\"_blank\">install guide</a> and configure using this <a href=\"https://docs.aws.amazon.com/cli/latest/userguide/cli-chap-configure.html\" target=\"_blank\">configuration guide</a>.</p>\n<p>Install the AWS CDK Toolkit globally using the following node package manager command:</p>\n<pre><code class=\"lang-\">$ npm install -g aws-cdk-lib@latest\n</code></pre>\n<p>Run the following command to verify the correct installation and print the version number of AWS CDK:</p>\n<pre><code class=\"lang-\">$ cdk --version\n</code></pre>\n<h4><a id=\"Clone_and_set_up_the_AWS_CDK_application_60\"></a><strong>Clone and set up the AWS CDK application</strong></h4>\n<p>On your local machine, clone the AWS CDK application with the following command:</p>\n<pre><code class=\"lang-\">$ git clone https://github.com/aws-samples/amazon-elasticache-demo-using-aws-cdk.git\n</code></pre>\n<p>Before we deploy the application, let’s review the directory structure:</p>\n<pre><code class=\"lang-\">├── CODE_OF_CONDUCT.md\n├── CONTRIBUTING.md\n├── LICENSE\n├── README.md\n├── app.py\n├── cdk.json\n├── elasticache_demo_cdk_app\n│ ├── __init__.py\n│ ├── elasticache_demo_cdk_app_stack.py\n│ └── user_data.sh\n├── images\n│ ├── ...\n├── requirements-dev.txt\n├── requirements.txt\n├── source.bat\n└── web-app\n ├── cacheLib.py\n ├── configs.json\n ├── static\n │ ├── ...\n ├── templates\n │ ├── ...\n └── webApp.py\n</code></pre>\n<p>The repository also contains the web application located under the subfolder <code>web-app</code>, which is installed on an EC2 instance at deployment.</p>\n<p>The <code>cdk.json</code> file tells the AWS CDK Toolkit how to run your app.</p>\n<h4><a id=\"Set_up_the_virtual_environment_100\"></a><strong>Set up the virtual environment</strong></h4>\n<p>This project is set up like a standard Python project. Create a Python virtual environment using the following code:</p>\n<pre><code class=\"lang-\">$ python3 -m venv .venv\n</code></pre>\n<p>Use the following step to activate the virtual environment:</p>\n<pre><code class=\"lang-\">$ source .venv/bin/activate\n</code></pre>\n<p>If you’re on a Windows platform, activate the virtual environment as follows:</p>\n<pre><code class=\"lang-\">% .venv\\Scripts\\activate.bat\n</code></pre>\n<p>After the virtual environment is activated, upgrade pip to the latest version:</p>\n<pre><code class=\"lang-\">$ python3 -m pip install --upgrade pip\n</code></pre>\n<p>Install the required dependencies:</p>\n<pre><code class=\"lang-\">$ pip install -r requirements.txt\n</code></pre>\n<p>Before you deploy any AWS CDK application, you need to bootstrap a space in your account and the Region you’re deploying into. To bootstrap in your default Region, issue the following command:</p>\n<pre><code class=\"lang-\">$ cdk bootstrap\n</code></pre>\n<p>To deploy into a specific account and Region, issue the following command, providing your account number and Region:</p>\n<pre><code class=\"lang-\">$ cdk bootstrap aws://ACCOUNT-NUMBER/REGION\n</code></pre>\n<p>For more information about this setup, visit <a href=\"https://docs.aws.amazon.com/cdk/latest/guide/getting_started.html\" target=\"_blank\">Getting started with the AWS CDK</a>.</p>\n<p>You can now synthesize the <a href=\"https://aws.amazon.com/cloudformation/\" target=\"_blank\">AWS CloudFormation</a> template for this AWS CDK application:</p>\n<pre><code class=\"lang-\">$ cdk synth\n</code></pre>\n<p>To add additional dependencies, for example other AWS CDK libraries, just add them to your setup.py file and rerun the <code>pip install -r requirements.txt</code> command.</p>\n<h4><a id=\"Other_useful_AWS_CDK_commands_154\"></a><strong>Other useful AWS CDK commands</strong></h4>\n<p>The following AWS CDK commands might also be useful:</p>\n<ul>\n<li>cdk ls – List all stacks in the app</li>\n<li>cdk synth – Emit the synthesized CloudFormation template</li>\n<li>cdk deploy – Deploy this stack to your default AWS account or Region</li>\n<li>cdk diff – Compare the deployed stack with the current state</li>\n<li>cdk docs – Open the AWS CDK documentation</li>\n</ul>\n<h4><a id=\"Run_the_AWS_CDK_application_164\"></a><strong>Run the AWS CDK application</strong></h4>\n<p>At this point, you can deploy the AWS CDK application:</p>\n<pre><code class=\"lang-\">$ cdk deploy\n</code></pre>\n<p>You should see a list of AWS resources that will be provisioned in the stack. Enter ‘y’ to proceed with the deployment.</p>\n<p><img src=\"https://dev-media.amazoncloud.cn/b5ccc086465c48ddb771a495809e7698_image.png\" alt=\"image.png\" /></p>\n<p>You can see the progress of the deployment on the terminal. It takes around 10 to 15 minutes to deploy the stack.</p>\n<p><img src=\"https://dev-media.amazoncloud.cn/f7313d9d4aef4c28bf473a93cc19a277_image.png\" alt=\"image.png\" /></p>\n<p>Once deployment is complete, you can see the total deployment time and AWS CloudFormation Outputs on the terminal. Take note of the web server public URL.</p>\n<p><img src=\"https://dev-media.amazoncloud.cn/0f2f8624e48645dca431a4cc1a95bbec_image.png\" alt=\"image.png\" /></p>\n<p>These outputs are also available on the AWS console. Navigate to the AWS CloudFormation console and choose the <code>ElasticacheDemoCdkAppStack</code> stack to see the details.</p>\n<p><img src=\"https://dev-media.amazoncloud.cn/6264f651efce4badb8b05a80e7232d9f_image.png\" alt=\"image.png\" /></p>\n<p>Review the resources under the <strong>Outputs</strong> tab.</p>\n<p><img src=\"https://dev-media.amazoncloud.cn/67ebb59e212a44719d03fd917da00c94_image.png\" alt=\"image.png\" /></p>\n<p>The web application retrieves these configurations automatically. However, take note of the web server public IP or URL. We need it to connect to the web server later.</p>\n<h4><a id=\"AWS_CDK_application_code_194\"></a><strong>AWS CDK application code</strong></h4>\n<p>The main AWS CDK application is in the app stack file, <a href=\"https://github.com/aws-samples/amazon-elasticache-demo-using-aws-cdk/blob/main/elasticache_demo_cdk_app/elasticache_demo_cdk_app_stack.py\" target=\"_blank\">elasticache_demo_cdk_app_stack.py</a>, and the whole infrastructure is defined as the <code>ElasticacheDemoCdkAppStack</code> class. Read through the comments to see what each block is doing.</p>\n<p>First, we import the necessary libraries needed to construct the stack:</p>\n<pre><code class=\"lang-\">from aws_cdk import (\n # Duration,\n Stack,\n aws_rds as rds,\n aws_ec2 as ec2,\n aws_iam as iam,\n aws_elasticache as elasticache,\n RemovalPolicy,\n CfnOutput\n)\n\nfrom constructs import Construct\n</code></pre>\n<p>Then in the class <code>ElasticacheDemoCdkAppStack</code>, we define the stack, starting with the virtual private network and security groups:</p>\n<pre><code class=\"lang-\">class ElasticacheDemoCdkAppStack(Stack):\n\n def __init__(self, scope: Construct, construct_id: str, **kwargs) -> None:\n super().__init__(scope, construct_id, **kwargs)\n\n # VPC \n vpc = ec2.Vpc(self, "VPC",\n nat_gateways=1,\n cidr="10.0.0.0/16",\n subnet_configuration=[\n ec2.SubnetConfiguration(name="public",subnet_type=ec2.SubnetType.PUBLIC,cidr_mask=24),\n ec2.SubnetConfiguration(name="private",subnet_type=ec2.SubnetType.PRIVATE_WITH_NAT,cidr_mask=24)\n ]\n )\n\n\n # Security Groups\n db_sec_group = ec2.SecurityGroup(\n self, "db-sec-group",security_group_name="db-sec-group", vpc=vpc, allow_all_outbound=True,\n )\n webserver_sec_group = ec2.SecurityGroup(\n self, "webserver_sec_group",security_group_name="webserver_sec_group", vpc=vpc, allow_all_outbound=True,\n )\n redis_sec_group = ec2.SecurityGroup(\n self, "redis-sec-group",security_group_name="redis-sec-group", vpc=vpc, allow_all_outbound=True,\n ) \n\n private_subnets_ids = [ps.subnet_id for ps in vpc.private_subnets]\n\n redis_subnet_group = elasticache.CfnSubnetGroup(\n scope=self,\n id="redis_subnet_group",\n subnet_ids=private_subnets_ids, # todo: add list of subnet ids here\n description="subnet group for redis"\n )\n\n # Add ingress rules to security group\n webserver_sec_group.add_ingress_rule( \n peer=ec2.Peer.ipv4("0.0.0.0/0"),\n description="Flask Application",\n connection=ec2.Port.tcp(app_port),\n )\n\n db_sec_group.add_ingress_rule( \n peer=webserver_sec_group,\n description="Allow MySQL connection",\n connection=ec2.Port.tcp(3306),\n )\n\n redis_sec_group.add_ingress_rule(\n peer=webserver_sec_group,\n description="Allow Redis connection",\n connection=ec2.Port.tcp(6379), \n )\n</code></pre>\n<p>Then we define the data stores used in the application, that is, Amazon RDS for MySQL and ElastiCache:</p>\n<pre><code class=\"lang-\"># RDS MySQL Database\n rds_instance = rds.DatabaseInstance(\n self, id='RDS-MySQL-Demo-DB',\n database_name='covid',\n engine=rds.DatabaseInstanceEngine.mysql(\n version=rds.MysqlEngineVersion.VER_8_0_23\n ),\n vpc=vpc,\n port=3306,\n instance_type= ec2.InstanceType.of(\n ec2.InstanceClass.BURSTABLE3,\n ec2.InstanceSize.MEDIUM,\n ),\n removal_policy=RemovalPolicy.DESTROY,\n deletion_protection=False,\n iam_authentication=True,\n security_groups=[db_sec_group],\n storage_encrypted=True,\n vpc_subnets=ec2.SubnetSelection(subnet_type=ec2.SubnetType.PRIVATE_WITH_NAT)\n )\n\n # Elasticache for Redis cluster\n redis_cluster = elasticache.CfnCacheCluster(\n scope=self,\n id="redis_cluster",\n engine="redis",\n cache_node_type="cache.t3.small",\n num_cache_nodes=1,\n cache_subnet_group_name=redis_subnet_group.ref,\n vpc_security_group_ids=[redis_sec_group.security_group_id],\n ) \n</code></pre>\n<p>Then we define the EC2 instance for the web server as well as the required <a href=\"http://aws.amazon.com/iam\" target=\"_blank\">AWS Identity and Access Management</a> (IAM) role and policies for the web server to access the data stores and <a href=\"https://aws.amazon.com/secrets-manager/\" target=\"_blank\">AWS Secrets Manager</a> to retrieve the database credentials:</p>\n<pre><code class=\"lang-\"># AMI definition\n amzn_linux = ec2.MachineImage.latest_amazon_linux(\n generation=ec2.AmazonLinuxGeneration.AMAZON_LINUX_2,\n edition=ec2.AmazonLinuxEdition.STANDARD,\n virtualization=ec2.AmazonLinuxVirt.HVM,\n storage=ec2.AmazonLinuxStorage.GENERAL_PURPOSE\n )\n\n # Instance Role and SSM Managed Policy\n role = iam.Role(self, "ElasticacheDemoInstancePolicy", assumed_by=iam.ServicePrincipal("ec2.amazonaws.com"))\n role.add_managed_policy(iam.ManagedPolicy.from_aws_managed_policy_name("AmazonSSMManagedInstanceCore")) \n role.add_managed_policy(iam.ManagedPolicy.from_aws_managed_policy_name("AWSCloudFormationReadOnlyAccess")) \n \n # The following inline policy makes sure we allow only retrieving the secret value, provided the secret is already known. \n # It does not allow listing of all secrets.\n role.attach_inline_policy(iam.Policy(self, "secret-read-only", \n statements=[iam.PolicyStatement(\n actions=["secretsmanager:GetSecretValue"],\n resources=["arn:aws:secretsmanager:*"],\n effect=iam.Effect.ALLOW\n )]\n )) \n\n # EC2 Instance for Web Server\n instance = ec2.Instance(self, "WebServer",\n instance_type=ec2.InstanceType("t3.small"),\n machine_image=amzn_linux,\n vpc = vpc,\n role = role,\n vpc_subnets=ec2.SubnetSelection(subnet_type=ec2.SubnetType.PUBLIC),\n security_group=webserver_sec_group,\n user_data=ec2.UserData.custom(user_data)\n ) \n</code></pre>\n<p>Lastly, we capture all CloudFormation stack outputs generated from the AWS CDK application stack:</p>\n<pre><code class=\"lang-\"> # Generate CloudFormation Outputs\n CfnOutput(scope=self,id="secret_name",value=rds_instance.secret.secret_name)\n CfnOutput(scope=self,id="mysql_endpoint",value=rds_instance.db_instance_endpoint_address)\n CfnOutput(scope=self,id="redis_endpoint",value=redis_cluster.attr_redis_endpoint_address)\n CfnOutput(scope=self,id="webserver_public_ip",value=instance.instance_public_ip)\n CfnOutput(scope=self,id="webserver_public_url",value='http://' + instance.instance_public_dns_name + ':' + str(app_port))\n</code></pre>\n<p>As described in the preceding code, the web server <code>userdata</code> is stored in the <a href=\"https://github.com/aws-samples/amazon-elasticache-demo-using-aws-cdk/blob/main/elasticache_demo_cdk_app/user_data.sh\" target=\"_blank\">user_data.sh</a> file. The content of <code>user_data.sh</code> is as follows:</p>\n<pre><code class=\"lang-\">#!/usr/bin/sh\n\nyum update -y\nyum install mariadb -y\nyum install git -y\nyum install tree -y\nyum install wget -y\nyum install jq -y\n\npip3 install flask redis pymysql boto3 requests\n\ncd /home/ec2-user\ngit clone https://github.com/aws-samples/amazon-elasticache-demo-using-aws-cdk.git\ncd amazon-elasticache-demo-using-aws-cdk\nwget https://aws-blogs-artifacts-public.s3.amazonaws.com/artifacts/DBBLOG-1922/sample-dataset.zip\nunzip sample-dataset.zip\nrm sample-dataset.zip\n\nchown -R ec2-user:ec2-user /home/ec2-user/*\n</code></pre>\n<p>The web server essentially clones the same Git repository of the main AWS CDK application. The script also downloads a sample dataset from located under the subfolder sample-data under the main folder. The dataset is from <a href=\"https://www.kaggle.com/charlieharper/spatial-data-for-cord19-covid19-ordc/version/2\" target=\"_blank\">Kaggle</a> and is licensed under <a href=\"https://creativecommons.org/licenses/by/4.0/\" target=\"_blank\">Creative Commons</a>.</p>\n<h4><a id=\"Verify_the_resources_created_by_AWS_CDK_385\"></a><strong>Verify the resources created by AWS CDK</strong></h4>\n<p>On the Amazon EC2 console, verify if the EC2 instance was created and is running.</p>\n<p><img src=\"https://dev-media.amazoncloud.cn/914570dd0749406e8920813b34afc197_image.png\" alt=\"image.png\" /></p>\n<p>On the Amazon RDS console, verify if the MySQL instance was created and is available.</p>\n<p><img src=\"https://dev-media.amazoncloud.cn/048307b756354540b01d23969a6b4e64_image.png\" alt=\"image.png\" /></p>\n<p>On the ElastiCache console, verify if the Redis cluster is available.</p>\n<p><img src=\"https://dev-media.amazoncloud.cn/a18890b9fd8a4faf9a8e698063bb3b73_image.png\" alt=\"image.png\" /></p>\n<p>The Amazon RDS CDK construct also automatically creates a secret in Secrets Manager. You can view the secret name in the CloudFormation stack outputs. The secret contains the MySQL user admin, automatically generated password, database host, and database name.</p>\n<p>The web application retrieves this information automatically from Secrets Manager, so you don’t need to note down these values.</p>\n<h4><a id=\"Connect_to_the_web_server_EC2_instance_403\"></a><strong>Connect to the web server EC2 instance</strong></h4>\n<p>We connect to the web server instance using <a href=\"https://docs.aws.amazon.com/systems-manager/latest/userguide/session-manager.html\" target=\"_blank\">AWS Systems Manager Session Manager</a> through the <a href=\"http://aws.amazon.com/console\" target=\"_blank\">AWS Management Console</a>. Leaving inbound SSH ports and remote PowerShell ports open on your managed nodes greatly increases the risk of entities running unauthorized or malicious commands on the managed nodes. Session Manager helps you improve your security posture by letting you close these inbound ports, freeing you from managing SSH keys and certificates, bastion hosts, and jump boxes.</p>\n<ol>\n<li>On the Amazon EC2 console, choose <strong>Instances</strong> in the navigation pane.</li>\n<li>Select the web server and choose <strong>Connect</strong>.</li>\n</ol>\n<p><img src=\"https://dev-media.amazoncloud.cn/4dbc35bbc03040e2bc8cc913264c1f08_image.png\" alt=\"image.png\" /></p>\n<ol start=\"3\">\n<li>On the <strong>Session Manager</strong> tab, choose <strong>Connect</strong>.</li>\n</ol>\n<p><img src=\"https://dev-media.amazoncloud.cn/c8dfe653f6604db39d8274c4fea91368_image.png\" alt=\"image.png\" /></p>\n<p>You log in as <code>ssm-user</code>. However, the web server’s user data script is run for <code>ec2-user</code>.</p>\n<ol start=\"4\">\n<li>Switch to <code>ec2-user</code> using the following command:</li>\n</ol>\n<pre><code class=\"lang-\">$ sudo su - ec2-user\n</code></pre>\n<p>You should land in the <code>ec2-user</code> home directory <code>/home/ec2-user</code>, which should contain the <code>elasticache-demo-cdk-application</code> subfolder. This the same repository that you cloned on your local machine. It contains the sample data that is inserted into the MySQL database as well as the web application. You can find the sample dataset and the web application in the <code>sample-dataset</code> and <code>web-app</code> subfolders, respectively.</p>\n<p>Let’s navigate to the web application subfolder from the home directory and see the content:</p>\n<pre><code class=\"lang-\">$ ls -l \n$ cd amazon-elasticache-demo-using-aws-cdk\n$ ls -l \n$ cd web-app \n$ ls -l\n</code></pre>\n<p><img src=\"https://dev-media.amazoncloud.cn/2f484427e6214a5887d6dc87c7ee8804_image.png\" alt=\"image.png\" /></p>\n<h4><a id=\"Overview_of_the_web_application_438\"></a><strong>Overview of the web application</strong></h4>\n<p>The web application is a Python <a href=\"https://www.fullstackpython.com/flask.html\" target=\"_blank\">Flask</a> application. The file <a href=\"https://github.com/aws-samples/amazon-elasticache-demo-using-aws-cdk/blob/main/web-app/webApp.py\" target=\"_blank\">webApp.py</a> is the main application, which contains the Flask routes for each operation, for example, query MySQL database and query cache. Refer to the following <code>webApp.py</code> code:</p>\n<pre><code class=\"lang-\">#!/usr/bin/env python3\n# -*- coding: utf-8 -*-\n\nimport json\nfrom datetime import datetime\nfrom flask import Flask, render_template\n\nfrom cacheLib import *\n\napp = Flask(__name__)\n\n\n############################### Flask Routes #################################\n\n@app.route("/")\ndef index():\n return render_template('index.html', rows=max_rows, sql=sql)\n\n@app.route("/query_mysql")\ndef query_mysql_endpoint():\n start_time = datetime.now()\n data = query_mysql(sql,configs['db_host'], configs['db_username'], configs['db_password'], configs['db_name'])\n delta = (datetime.now() - start_time).total_seconds()\n return render_template('query_mysql.html', delta=delta, data=data, sql=sql, fields=db_tbl_fields)\n\n@app.route("/query_cache")\ndef query_cache_endpoint():\n data = None \n start_time = datetime.now()\n result = query_mysql_and_cache(sql,configs['db_host'], configs['db_username'], configs['db_password'], configs['db_name'])\n delta = (datetime.now() - start_time).total_seconds() \n\n if isinstance(result['data'], list):\n data = result['data']\n else:\n data = json.loads(result['data'])\n\n return render_template('query_cache.html', delta=delta, data=data, records_in_cache=result['records_in_cache'], \n TTL=Cache.ttl(sql), sql=sql, fields=db_tbl_fields)\n\n@app.route("/delete_cache")\ndef delete_cache_endpoint():\n flush_cache()\n return render_template('delete_cache.html') \n\nif __name__ == "__main__":\n app.run(debug=False, use_reloader=False, host='0.0.0.0', port=app_port) \n</code></pre>\n<p>The <code>webApp.py</code> file imports <code>cacheLib</code>. The file cacheLib.py contains the key procedures to perform the following actions:</p>\n<ul>\n<li>Retrieve the MySQL and ElastiCache for Redis endpoints from the CloudFormation stack outputs</li>\n<li>Load the sample data into the MySQL database</li>\n<li>Store all configurations in <code>config.json</code>, which is automatically created when the application is run for the first time</li>\n<li>Query the MySQL database</li>\n<li>Query ElastiCache</li>\n</ul>\n<p>Refer to the <a href=\"https://github.com/aws-samples/amazon-elasticache-demo-using-aws-cdk/blob/main/web-app/cacheLib.py\" target=\"_blank\">cacheLib.py</a> file to understand the respective functions. One of these functions is called <code>query_mysql_and_cache</code>, which is triggered by the web application under <code>@app.route ("/query_cache"</code>). This function checks if the dataset is in the cache first. If there is a cache hit, the dataset is served by ElastiCache at low latency. Otherwise, the dataset is retrieved from MySQL and then cached into ElastiCache for future queries. The following is the <code>query_mysql_and_cache</code> code snippet:</p>\n<pre><code class=\"lang-\">def query_mysql_and_cache(sql,db_host, db_username, db_password, db_name):\n '''\n This function retrieves records from the cache if it exists, or else gets it from the MySQL database.\n ''' \n\n res = Cache.get(sql)\n\n if res:\n print ('Records in cache...')\n return ({'records_in_cache': True, 'data' : res})\n \n res = mysql_fetch_data(sql, db_host, db_username, db_password, db_name)\n \n if res:\n print ('Cache was empty. Now populating cache...') \n Cache.setex(sql, ttl, json.dumps(res))\n return ({'records_in_cache': False, 'data' : res})\n else:\n return None\n</code></pre>\n<h4><a id=\"Start_the_web_application_524\"></a><strong>Start the web application</strong></h4>\n<p>The necessary runtimes and modules were already installed at instance creation using the <code>userdata</code> contained in the <code>user_data.sh</code> file in the AWS CDK application.</p>\n<p>Let’s start the web application with the following command:</p>\n<pre><code class=\"lang-\">$ python3 webApp.py\n</code></pre>\n<p><img src=\"https://dev-media.amazoncloud.cn/4aeb2270831543749b15dbe9ad2394fc_image.png\" alt=\"image.png\" /></p>\n<h4><a id=\"Use_the_web_application_536\"></a><strong>Use the web application</strong></h4>\n<p>From a browser, access the web server’s public IP address or URL with port 8008 (or any other ports if you changed it), for example, <code>http://WEBSERVER-PUBLIC-IP:8008</code>. This should take you to the landing page of the web application, as shown in the following screenshot.</p>\n<p><img src=\"https://dev-media.amazoncloud.cn/3767dd3c2c2a4915a494961956f7a6d5_image.png\" alt=\"image.png\" /></p>\n<p>If you cannot access the site using port 8008, you can be behind a VPN or firewall that is blocking that port. Try disconnecting your VPN or switching network.</p>\n<p>Now let’s query the MySQL database. Choose <strong>Query MySQL</strong> on the navigation bar.</p>\n<p><img src=\"https://dev-media.amazoncloud.cn/4baa784b762a4b43813a227da9ddd3cf_image.png\" alt=\"image.png\" /></p>\n<p>You can review the time it took to run the query. Now let’s try to query the cache by choosing <strong>Query Cache</strong>.</p>\n<p><img src=\"https://dev-media.amazoncloud.cn/3a87ac4fff9b4260bd540f6006ebb4f9_image.png\" alt=\"image.png\" /></p>\n<p>Notice that it took almost the same time to run. This is because the first time you access the Redis cache, it’s empty. So the application gets the data from the MySQL database and then caches it into the Redis cache.</p>\n<p>Now, try querying the cache again and observe the new runtime. You should see a value in the order of milliseconds. This is very fast!</p>\n<p><img src=\"https://dev-media.amazoncloud.cn/533dd78f03a1429ca88e94fdeb8170da_image.png\" alt=\"image.png\" /></p>\n<p>If you look at your terminal, you can see the HTTP requests made from the browser. This can be helpful if you need to troubleshoot.</p>\n<pre><code class=\"lang-\">[ec2-user@ip-10-0-0-96 web-app]$ python3 webApp.py\nLocal config file found...Initializing MySQL Database...\n * Serving Flask app 'webApp' (lazy loading)\n * Environment: production\n WARNING: This is a development server. Do not use it in a production deployment.\n Use a production WSGI server instead.\n * Debug mode: off * Running on all addresses (0.0.0.0)\n WARNING: This is a development server. Do not use it in a production deployment. * Running on http://127.0.0.1:8008\n * Running on http://10.0.0.96:8008 (Press CTRL+C to quit)\n151.192.221.101 - - [14/Apr/2022 16:36:41] "GET / HTTP/1.1" 200 -\n151.192.221.101 - - [14/Apr/2022 16:36:41] "GET /static/css/custom.css HTTP/1.1" 200 -151.192.221.101 - - [14/Apr/2022 16:36:41] "GET /static/img/redis.png HTTP/1.1" 200 -\n151.192.221.101 - - [14/Apr/2022 16:36:42] "GET /favicon.ico HTTP/1.1" 404 -\nCache was empty. Now populating cache...151.192.221.101 - - [14/Apr/2022 16:36:46] "GET /query_cache HTTP/1.1" 200 -\n151.192.221.101 - - [14/Apr/2022 16:36:46] "GET /static/css/custom.css HTTP/1.1" 304 -151.192.221.101 - - [14/Apr/2022 16:36:46] "GET /static/img/redis.png HTTP/1.1" 304 -\nRecords in cache...151.192.221.101 - - [14/Apr/2022 16:36:47] "GET /query_cache HTTP/1.1" 200 -\n151.192.221.101 - - [14/Apr/2022 16:36:47] "GET /static/css/custom.css HTTP/1.1" 304 -151.192.221.101 - - [14/Apr/2022 16:36:47] "GET /static/img/redis.png HTTP/1.1" 304 -\nRecords in cache...\n151.192.221.101 - - [14/Apr/2022 16:36:49] "GET /query_cache HTTP/1.1" 200 -\n151.192.221.101 - - [14/Apr/2022 16:36:49] "GET /static/css/custom.css HTTP/1.1" 304 -\n151.192.221.101 - - [14/Apr/2022 16:36:49] "GET /static/img/redis.png HTTP/1.1" 304 -\nRecords in database...\n</code></pre>\n<h4><a id=\"Clean_up_584\"></a><strong>Clean up</strong></h4>\n<p>To avoid unnecessary cost, clean up all the infrastructure created with the following command on your workstation:</p>\n<pre><code class=\"lang-\">(.venv) [~/amazon-elasticache-demo-using-aws-cdk] $ cdk destroy\nAre you sure you want to delete: ElasticacheDemoCdkAppStack (y/n)? y\nElasticacheDemoCdkAppStack: destroying...\n\n\n ✅ ElasticacheDemoCdkAppStack: destroyed \n</code></pre>\n<h4><a id=\"Conclusion_597\"></a><strong>Conclusion</strong></h4>\n<p>As demonstrated in this post, you can use AWS CDK to create the infrastructure for an Amazon ElastiCache application. We showed the difference in runtime between ElastiCache and an Amazon RDS with MySQL engine. You can now build your own infrastructure and application using the caching capability of Amazon ElastiCache to accelerate performance for a better user experience.</p>\n<p>We invite you to test the solution and contribute to the project on <a href=\"https://github.com/aws-samples/amazon-elasticache-demo-using-aws-cdk/\" target=\"_blank\">GitHub</a>. Share your thoughts on this tutorial, in the comments below!</p>\n<h4><a id=\"License_summary_603\"></a><strong>License summary</strong></h4>\n<p>This <a href=\"https://github.com/aws-samples/amazon-elasticache-demo-using-aws-cdk/\" target=\"_blank\">sample code</a> is made available under a modified MIT license. See the LICENSE file for more information.</p>\n<h4><a id=\"About_the_Authors_607\"></a><strong>About the Authors</strong></h4>\n<p><img src=\"https://dev-media.amazoncloud.cn/97b9eccde99e463aa2c1c4af1a0ee907_image.png\" alt=\"image.png\" /></p>\n<p><strong>Hantzley Tauckoor</strong> is an APJ Partner Solutions Architecture Leader based in Singapore. He has 20 years’ experience in the ICT industry spanning multiple functional areas, including solutions architecture, business development, sales strategy, consulting, and leadership. He leads a team of Senior Solutions Architects that enable partners to develop joint solutions, build technical capabilities, and steer them through the execution phase as customers migrate and modernize their applications to AWS. Outside work, he enjoys spending time with his family, watching movies, and hiking.</p>\n<p><img src=\"https://dev-media.amazoncloud.cn/4d6b5ea1acb44d59a17ed505f7dbae04_image.png\" alt=\"image.png\" /></p>\n<p><strong>Calvin Ngo</strong> is a Senior Specialist Solutions Architect in the Developer Acceleration team at AWS. His mission is to help developers adopt cloud technologies and refactoring systems and applications using modern development techniques. He does this by taking a cross-functional, coordinated approach to developer enablement. In his spare time, he likes taking his kids for a bike ride around Singapore and also kayaking to nearby islands.</p>\n"}
Deploy Amazon ElastiCache for Redis using Amazon CDK
海外精选

海外精选的内容汇集了全球优质的亚马逊云科技相关技术内容。同时,内容中提到的“AWS”
是 “Amazon Web Services” 的缩写,在此网站不作为商标展示。

 0
0 0
0亚马逊云科技解决方案 基于行业客户应用场景及技术领域的解决方案
联系亚马逊云科技专家
亚马逊云科技解决方案
基于行业客户应用场景及技术领域的解决方案
联系专家

0
目录

 分享
分享 点赞
点赞 收藏
收藏 目录
目录立即注册,开启您的免费套餐
立即关注

亚马逊云开发者
公众号

User Group
公众号

亚马逊云科技
官方小程序
“AWS” 是 “Amazon Web Services” 的缩写,在此网站不作为商标展示。
立即关注
亚马逊云开发者
公众号
User Group
公众号
亚马逊云科技
官方小程序
“AWS” 是 “Amazon Web Services” 的缩写,在此网站不作为商标展示。
关于我们 
更多资源
开发者工具
更多支持
立即关注
亚马逊云开发者
公众号
User Group
公众号
亚马逊云科技
官方小程序
“AWS” 是 “Amazon Web Services” 的缩写,在此网站不作为商标展示。
