{"value":"Modern location-based applications require the processing and storage of real-world assets in real-time. The recent release of [Amazon Location Service](https://aws.amazon.com/location/) and its [Tracker](https://aws.amazon.com/location/features/) feature makes it possible to quickly and easily build these applications on the AWS platform. Tracking real-world assets is important, but at some point when working with Location Services you will need to demo or test location-based applications without real-world assets.\n\nApplications that track real-world assets are difficult to test and demo in a realistic setting, and it can be hard to get your hands on large amounts of real-world location data. Furthermore, not every company or individual in the early stages of developing a tracking application has access to a large fleet of test vehicles from which to derive this data.\n\nLocation data can also be considered highly sensitive, because it can be easily de-anonymized to identify individuals and movement patterns. Therefore, only a few openly accessible datasets exist and are unlikely to exhibit the characteristics required for your particular use-case.\n\nTo overcome this problem, the location-based services community has developed multiple openly available location data simulators. This blog will demonstrate how to connect one of those simulators to Amazon Location Service Tracker to test and demo your location-based services on AWS.\n\n### **Walk-through**\n#### **Part 1: Create a tracker in Amazon Location Service**\nThis walkthrough will demonstrate how to get started setting up simulated data into your tracker.\n\n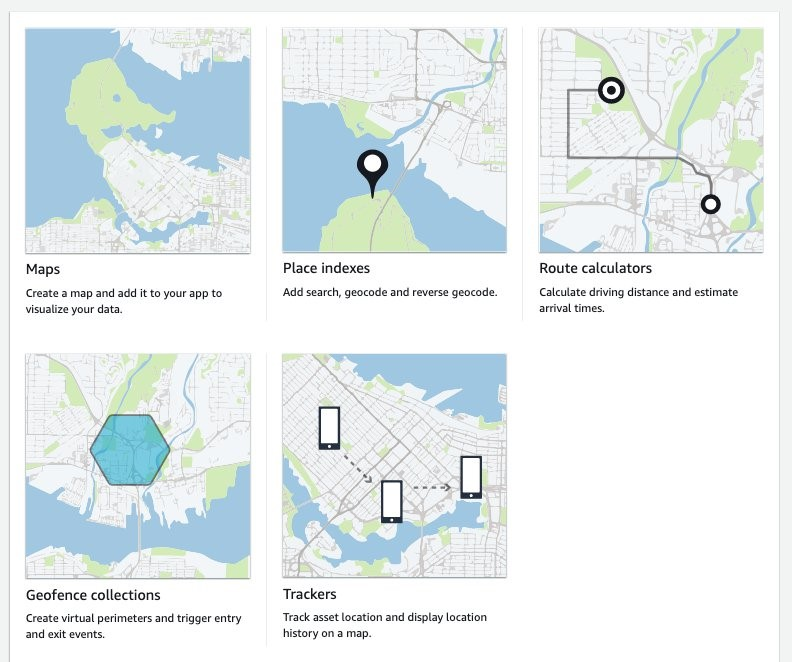\n\n**Step 1**: Navigate to Amazon Location Service in the AWS Console and select “Trackers“.\n\n**Step 2**: On the “Trackers” screen click the orange “Create tracker“ button.\n\n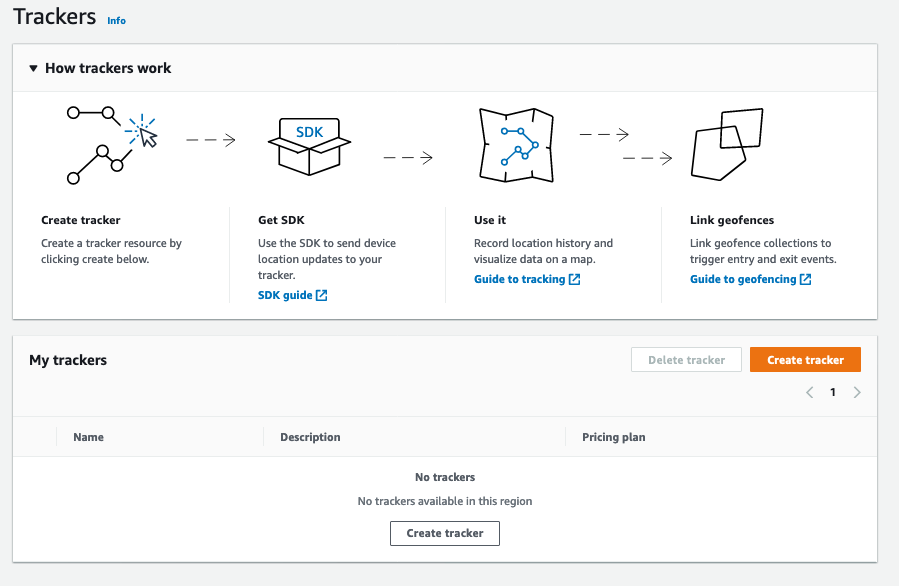\n\n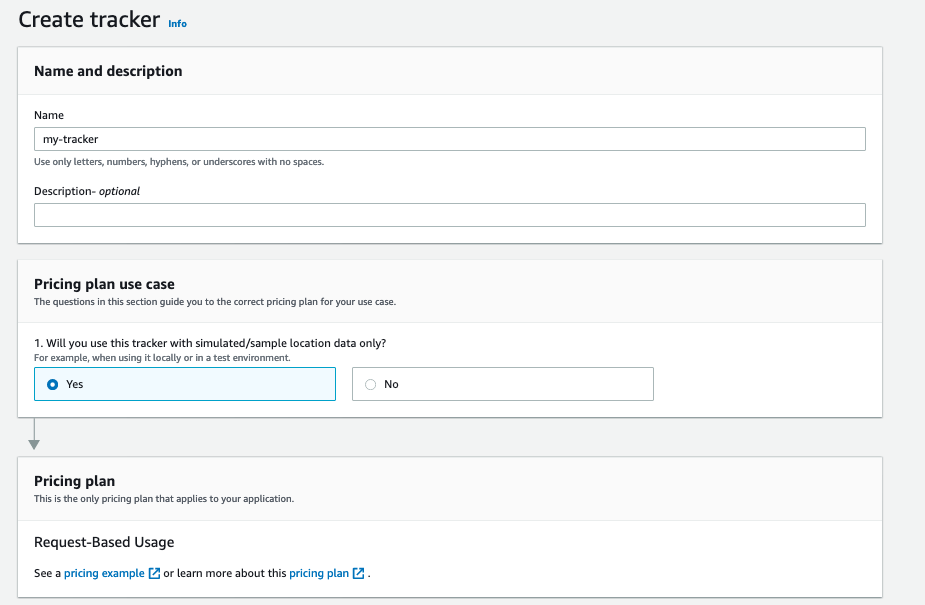\n\n**Step 3**: On the “Create tracker” screen, name your tracker and make sure to reply “Yes” to the question asking you if you will only use simulated or sample data. This allows you to use the free-tier of the service.\n\nNext, click “Create tracker” to create you tracker.\n\n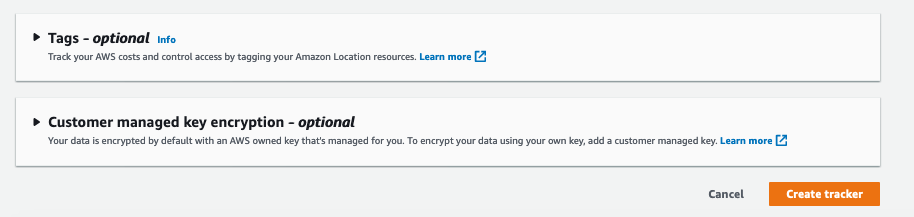\n\n*Done. You’ve created a tracker. Note the “Name” of your tracker.*\n\n#### **Generate trips with the SharedStreets Trip-simulator**\n\nA common option for simulating trip data is the [shared-steets/trip-simulator](https://github.com/sharedstreets/trip-simulator) project.\n\nSharedStreets maintains an open-source project on GitHub – it is a probabilistic, multi-agent GPS trajectory simulator. It even creates realistic noise, and thus can be used for testing algorithms that must work under real-world conditions. Of course, the generated data is fake, so privacy is not a concern.\n\nThe trip-simulator generates files with a single GPS measurement per line. To playback those files to the Amazon Location Service Tracker, you must use a tool to parse the file; extract the GPS measurements, time measurements, and device IDs of the simulated vehicles; and send them to the tracker at the right time.\n\nBefore you start working with the playback program, the trip-simulator requires a map to simulate realistic trips. Therefore, you must download a part of [OpenStreetMap](https://www.openstreetmap.org/) (OSM). Using [GeoFabrik](https://download.geofabrik.de/) you can download extracts at the size of states or selected cities based on the area within which you want to simulate your data.\n\nThis blog will demonstrate how to simulate a small fleet of cars in the greater Munich area. The example will be written for OS-X, but it generalizes to Linux operating systems. If you have a Windows operating system, I recommend using Windows Subsystem for Linux (WSL). Alternatively, you can run this from a [Cloud9](https://aws.amazon.com/cloud9/) IDE in your AWS account.\n\n**Step 1: Download the Oberbayern region from [download.geofabrik.de](http://download.geofabrik.de/)**\n\nPrerequisites:\n\n- [curl](https://curl.se/)\n\nBash\n```\ncurl https://download.geofabrik.de/europe/germany/bayern/oberbayern-latest.osm.pbf -o oberbayern-latest.osm.pbf\n```\n**Step 2: Install osmium-tool**\n\nPrerequisites:\n\n- [Homebrew](https://brew.sh/)\n\n\nBash\n```\nbrew install osmium-tool\n```\n\n**Step 3: Extract Munich from the Oberbayern map**\n\nBash\n```\nosmium extract -b \"11.5137,48.1830,11.6489,48.0891\" oberbayern-latest.osm.pbf -o ./munich.osm.pbf -s \"complete_ways\" --overwrite\n```\n\n**Step 4: Pre-process the OSM map for the vehicle routing**\n\nPrerequisites:\n\n- [Docker](https://www.docker.com/)\n\nBash\n```\ndocker run -t -v $(pwd):/data osrm/osrm-backend:v5.25.0 osrm-extract -p /opt/car.lua /data/munich.osm.pbf\ndocker run -t -v $(pwd):/data osrm/osrm-backend:v5.25.0 osrm-contract /data/munich.osrm\n```\n**Step 5: Install the trip-simulator**\n\nPrerequisites:\n\n- [Node.js](https://nodejs.org/en/)\n\nBash\n```\nnpm install -g trip-simulator\n```\n**Step 6: Run a 10 car, 30 minute car simulation**\n\nBash\n```\ntrip-simulator \\\n --config car \\\n --pbf munich.osm.pbf \\\n --graph munich.osrm \\\n --agents 10 \\\n --start 1563122921000 \\\n --seconds 1800 \\\n --traces ./traces.json \\\n --probes ./probes.json \\\n --changes ./changes.json \\\n --trips ./trips.json\n```\n*The probes.json file is the file containing the GPS probes we will playback to Amazon Location Service.*\n\n#### **Part 2: Playback trips to Amazon Location Service**\nNow that you have simulated trips in the probes.json file, you can play them back in the tracker created earlier. For this, you must write only a few lines of Python code. The following steps have been neatly separated into a series of functions that yield an iterator.\n\nPrerequisites:\n\n- [Python](https://www.python.org/downloads/) 3.7\n- [boto3](https://boto3.amazonaws.com/v1/documentation/api/latest/index.html)\n\n**Step 1: Load the probes.json file and yield each line**\n\nPython\n```\nimport json\nimport time\nimport datetime\nimport boto3\n\ndef iter_probes_file(probes_file_name=\"probes.json\"):\n \"\"\"Iterates a file line by line and yields each individual line.\"\"\"\n with open(probes_file_name) as probes_file:\n while True:\n line = probes_file.readline()\n if not line:\n break\n yield line\n```\n**Step 2: Parse the probe on each line**\nTo process the probes, you parse the JSON on each line and extract the data relevant for the playback. Note that the coordinates order is longitude, latitude in the probes.json file. This is the same order that the Location Service expects.\n\nPython\n```\ndef parse_probes_trip_simulator(probes_iter):\n \"\"\"Parses a file witch contains JSON document, one per line.\n Each line contains exactly one GPS probe. Example:\n {\"properties\":{\"id\":\"RQQ-7869\",\"time\":1563123002000,\"status\":\"idling\"},\"geometry\":{\"type\":\"Point\",\"coordinates\":[-86.73903753135207,36.20418779626351]}}\n The function returns the tuple (id,time,status,coordinates=(lon,lat))\n \"\"\"\n for line in probes_iter:\n probe = json.loads(line)\n props = probe[\"properties\"]\n geometry = probe[\"geometry\"]\n yield props[\"id\"], props[\"time\"], props[\"status\"], geometry[\"coordinates\"]\n```\n**Step 3: Update probe record time**\n\nThe probes represent historical data. Therefore, when you playback you will need to normalize the probes recorded time to sync with the time you send the request in order to achieve the effect of vehicles moving in real-time.\n\nThis example is a single threaded playback. If the simulated playback lags behind the probe data timing, then you will be provided a warning through the code detecting the lag and outputting a warning.\n\nThe SharedStreets trip-simulator generates one probe per second. This frequency is too high for most applications, and in real-world applications you will often see frequencies of 15 to 60 seconds or even less. You must decide if you want to add another iterator for sub-sampling the data.\n\nPython\n```\ndef update_probe_record_time(probes_iter):\n \"\"\"\n Modify all timestamps to be relative to the time this function was called.\n I.e. all timestamps will be equally spaced from each other but in the future.\n \"\"\"\n new_simulation_start_time_utc_ms = datetime.datetime.now().timestamp() * 1000\n simulation_start_time_ms = None\n time_delta_recording_ms = None\n for i, (_id, time_ms, status, coordinates) in enumerate(probes_iter):\n if time_delta_recording_ms is None:\n time_delta_recording_ms = new_simulation_start_time_utc_ms - time_ms\n simulation_start_time_ms = time_ms\n simulation_lag_sec = (\n (\n datetime.datetime.now().timestamp() * 1000\n - new_simulation_start_time_utc_ms\n )\n - (simulation_start_time_ms - time_ms)\n ) / 1000\n if simulation_lag_sec > 2.0 and i % 10 == 0:\n print(f\"Playback lags behind by {simulation_lag_sec} seconds.\")\n time_ms += time_delta_recording_ms\n yield _id, time_ms, status, coordinates\n```\n**Step 4: Playback probes**\nIn this step, pack the probes into small batches and introduce the timing element into the simulation playback. The reason for placing them in batches is explained below in step 6.\n\nPython\n```\ndef sleep(time_elapsed_in_batch_sec, last_sleep_time_sec):\n sleep_time = max(\n 0.0,\n time_elapsed_in_batch_sec\n - (datetime.datetime.now().timestamp() - last_sleep_time_sec),\n )\n time.sleep(sleep_time)\n if sleep_time > 0.0:\n last_sleep_time_sec = datetime.datetime.now().timestamp()\n return last_sleep_time_sec\n\n\ndef playback_probes(\n probes_iter,\n batch_size=10,\n batch_window_size_sec=2.0,\n):\n \"\"\"\n Replays the probes in live mode.\n The function assumes, that the probes returned by probes_iter are sorted\n in ascending order with respect to the probe timestamp.\n It will either yield batches of size 10 or smaller batches if the timeout is reached.\n \"\"\"\n last_probe_record_time_sec = None\n time_elapsed_in_batch_sec = 0\n last_sleep_time_sec = datetime.datetime.now().timestamp()\n batch = []\n # Creates two second windows and puts all the probes falling into\n # those windows into a batch. If the max. batch size is reached it will yield early.\n for _id, time_ms, status, coordinates in probes_iter:\n probe_record_time_sec = time_ms / 1000\n if last_probe_record_time_sec is None:\n last_probe_record_time_sec = probe_record_time_sec\n time_to_next_probe_sec = probe_record_time_sec - last_probe_record_time_sec\n if (time_elapsed_in_batch_sec + time_to_next_probe_sec) > batch_window_size_sec:\n last_sleep_time_sec = sleep(time_elapsed_in_batch_sec, last_sleep_time_sec)\n yield batch\n batch = []\n time_elapsed_in_batch_sec = 0\n time_elapsed_in_batch_sec += time_to_next_probe_sec\n batch.append((_id, time_ms, status, coordinates))\n if len(batch) == batch_size:\n last_sleep_time_sec = sleep(time_elapsed_in_batch_sec, last_sleep_time_sec)\n yield batch\n batch = []\n time_elapsed_in_batch_sec = 0\n last_probe_record_time_sec = probe_record_time_sec\n if len(batch) > 0:\n last_sleep_time_sec = sleep(time_elapsed_in_batch_sec, last_sleep_time_sec)\n yield batch\n```\n**Step 5: Create the updates for the tracker**\n\nPython\n```\nLOCAL_TIMEZONE = (\n datetime.datetime.now(datetime.timezone(datetime.timedelta(0))).astimezone().tzinfo\n)\n\ndef convert_to_tracker_updates(probes_batch_iter):\n \"\"\"\n Converts batches of probes in the format (id,time_ms,state,coordinates=(lon,lat))\n into batches ready for upload to the tracker.\n \"\"\"\n for batch in probes_batch_iter:\n updates = []\n for _id, time_ms, _, coordinates in batch:\n # The boto3 location service client expects a datetime object for sample time\n dt = datetime.datetime.fromtimestamp(time_ms / 1000, LOCAL_TIMEZONE)\n updates.append({\"DeviceId\": _id, \"Position\": coordinates, \"SampleTime\": dt})\n yield updates\n```\n**Step 6: Send the updates to the tracker**\nIn the update_tracker function, you use the batch_update_device_position function of the Amazon Location Service Tracker API. This lets you send batches of up to 10 location updates to the tracker in one request. Batching updates is much more cost-effective than sending one-by-one. You pay for each call to batch_update_device_position. Therefore, batching can lead to a 10x cost reduction.\n\nPython\n```\ndef update_tracker(batch_iter, location_client, tracker_name):\n \"\"\"\n Reads tracker updates from an iterator and uploads them to the tracker.\n \"\"\"\n for update in batch_iter:\n response = location_client.batch_update_device_position(\n TrackerName=tracker_name, Updates=update\n )\n if \"Errors\" in response and response[\"Errors\"]:\n for error in response[\"Errors\"]:\n print(error[\"Error\"][\"Message\"])\n```\n**Step 7: Putting it all together**\nThe follow code is the main section that glues every part together. When using this, make sure to replace the variables probes_file_name and tracker_name with the actual probes file location and the name of the tracker created earlier.\n\nPython\n```\nif __name__ == \"__main__\":\n location_client = boto3.client(\"location\")\n probes_file_name = \"probes.json\"\n tracker_name = \"my-tracker\"\n iterator = iter_probes_file(probes_file_name)\n iterator = parse_probes_trip_simulator(iterator)\n iterator = update_probe_record_time(iterator)\n iterator = playback_probes(iterator)\n iterator = convert_to_tracker_updates(iterator)\n update_tracker(\n iterator, location_client=location_client, tracker_name=tracker_name\n )\n```\nPaste all of the code listed in steps 1 to 7 into a file called trip_playback.py, then execute\n\nBash\n```\npython3 trip_playback.py\n```\n*This will start the playback process.*\n\n**Step 8: (Optional) Tracking a device’s position updates**\nOnce the playback is running, verify that the updates are actually written to the tracker repeatedly querying the tracker for updates for a single device. Here, you will use the get_device_position function of the Amazon Location Service Tracker API to receive the last known device position.\n\nPython\n```\nimport boto3\nimport time\n\ndef get_last_vehicle_position_from_tracker(\n device_id, tracker_name=\"your-tracker\", client=boto3.client(\"location\")\n):\n response = client.get_device_position(DeviceId=device_id, TrackerName=tracker_name)\n if response[\"ResponseMetadata\"][\"HTTPStatusCode\"] != 200:\n print(str(response))\n else:\n lon = response[\"Position\"][0]\n lat = response[\"Position\"][1]\n return lon, lat, response[\"SampleTime\"]\n \nif __name__ == \"__main__\": \n device_id = \"my-device\" \n tracker_name = \"my-tracker\"\n while True:\n lon, lat, sample_time = get_last_vehicle_position_from_tracker(\n device_id=device_id, tracker_name=tracker_name\n )\n print(f\"{lon}, {lat}, {sample_time}\")\n time.sleep(10)\n```\nIn the example above, you must replace the tracker_name with the name of the tracker created earlier and the device_id with the ID of one of the simulation vehicles. You can find the vehicle IDs in the probes.json file created by the SharedStreets trip-simulator. If you run the above code, then you should see the following output.\n\n\n\n### **AWS IoT Device Simulator**\nAs an alternative, if you are familiar with AWS IoT, AWS has its own vehicle simulator that is part of the [IoT Device Simulator](https://aws.amazon.com/solutions/implementations/iot-device-simulator/) solution. It lets you simulate a vehicle fleet moving on a road network. This has been described [here](https://aws.amazon.com/solutions/implementations/iot-device-simulator/). The simulator sends the location data to an [Amazon IoT](https://aws.amazon.com/iot/) endpoint. The Amazon Location Service [Developer Guide](https://docs.aws.amazon.com/location/latest/developerguide/tracking-using-mqtt.html) shows how to write and set-up a Lambda function to connect the IoT topic to the tracker.\n\nThe AWS IoT Device Simulator has a GUI and is a good choice for simulating a small number of vehicles. The drawback is that only a few trips are pre-packaged with the simulator and changing them is somewhat complicated. The SharedStreets Trip-simulator has much more flexibility, allowing simulations of fleets made up of a larger number of vehicles, but it has no GUI for controlling the playback or simulation.\n\n### **Cleanup**\nYou’ve created a Location Service Tracker resource. It does not incur any charges if it isn’t used. If you want to delete it, you can do so on the Amazon Location Service Tracker console.\n\n### **Conclusion**\nThis blog showed you how to use an open-source project and open-source data to generate simulated trips, as well as how to play those trips back to the Amazon Location Service Tracker. Furthermore, you have access to the AWS IoT Device Simulator, which can also be used for simulating vehicles.\n\nGive it a try and tell us how you test your location-based applications in the comments.\n\n### **About the authors**\n\n**Florian Seidel**\nFlorian is a Solutions Architect in the EMEA Automotive Team at AWS. He has worked on location based services in the automotive industry for the last three years and has many years of experience in software engineering and software architecture.\n\n**Aaron Sempf**\nAaron is a Senior Partner Solutions Architect, in the Global Systems Integrators team. When not working with AWS GSI partners, he can be found coding prototypes for autonomous robots, IoT devices, and distributed solutions.","render":"<p>Modern location-based applications require the processing and storage of real-world assets in real-time. The recent release of <a href=\"https://aws.amazon.com/location/\" target=\"_blank\">Amazon Location Service</a> and its <a href=\"https://aws.amazon.com/location/features/\" target=\"_blank\">Tracker</a> feature makes it possible to quickly and easily build these applications on the AWS platform. Tracking real-world assets is important, but at some point when working with Location Services you will need to demo or test location-based applications without real-world assets.</p>\n<p>Applications that track real-world assets are difficult to test and demo in a realistic setting, and it can be hard to get your hands on large amounts of real-world location data. Furthermore, not every company or individual in the early stages of developing a tracking application has access to a large fleet of test vehicles from which to derive this data.</p>\n<p>Location data can also be considered highly sensitive, because it can be easily de-anonymized to identify individuals and movement patterns. Therefore, only a few openly accessible datasets exist and are unlikely to exhibit the characteristics required for your particular use-case.</p>\n<p>To overcome this problem, the location-based services community has developed multiple openly available location data simulators. This blog will demonstrate how to connect one of those simulators to Amazon Location Service Tracker to test and demo your location-based services on AWS.</p>\n<h3><a id=\"Walkthrough_8\"></a><strong>Walk-through</strong></h3>\n<h4><a id=\"Part_1_Create_a_tracker_in_Amazon_Location_Service_9\"></a><strong>Part 1: Create a tracker in Amazon Location Service</strong></h4>\n<p>This walkthrough will demonstrate how to get started setting up simulated data into your tracker.</p>\n<p><img src=\"https://dev-media.amazoncloud.cn/0a8e301110dd431e9e25b1fa3bd7b08e_image.png\" alt=\"image.png\" /></p>\n<p><strong>Step 1</strong>: Navigate to Amazon Location Service in the AWS Console and select “Trackers“.</p>\n<p><strong>Step 2</strong>: On the “Trackers” screen click the orange “Create tracker“ button.</p>\n<p><img src=\"https://dev-media.amazoncloud.cn/8de2aa4c873d4505915dabaf8d4ee736_image.png\" alt=\"image.png\" /></p>\n<p><img src=\"https://dev-media.amazoncloud.cn/6e5cd82caac2403b86a78c50ebc10670_image.png\" alt=\"image.png\" /></p>\n<p><strong>Step 3</strong>: On the “Create tracker” screen, name your tracker and make sure to reply “Yes” to the question asking you if you will only use simulated or sample data. This allows you to use the free-tier of the service.</p>\n<p>Next, click “Create tracker” to create you tracker.</p>\n<p><img src=\"https://dev-media.amazoncloud.cn/70f7ab848c874eed8f8b09279832b21a_image.png\" alt=\"image.png\" /></p>\n<p><em>Done. You’ve created a tracker. Note the “Name” of your tracker.</em></p>\n<h4><a id=\"Generate_trips_with_the_SharedStreets_Tripsimulator_30\"></a><strong>Generate trips with the SharedStreets Trip-simulator</strong></h4>\n<p>A common option for simulating trip data is the <a href=\"https://github.com/sharedstreets/trip-simulator\" target=\"_blank\">shared-steets/trip-simulator</a> project.</p>\n<p>SharedStreets maintains an open-source project on GitHub – it is a probabilistic, multi-agent GPS trajectory simulator. It even creates realistic noise, and thus can be used for testing algorithms that must work under real-world conditions. Of course, the generated data is fake, so privacy is not a concern.</p>\n<p>The trip-simulator generates files with a single GPS measurement per line. To playback those files to the Amazon Location Service Tracker, you must use a tool to parse the file; extract the GPS measurements, time measurements, and device IDs of the simulated vehicles; and send them to the tracker at the right time.</p>\n<p>Before you start working with the playback program, the trip-simulator requires a map to simulate realistic trips. Therefore, you must download a part of <a href=\"https://www.openstreetmap.org/\" target=\"_blank\">OpenStreetMap</a> (OSM). Using <a href=\"https://download.geofabrik.de/\" target=\"_blank\">GeoFabrik</a> you can download extracts at the size of states or selected cities based on the area within which you want to simulate your data.</p>\n<p>This blog will demonstrate how to simulate a small fleet of cars in the greater Munich area. The example will be written for OS-X, but it generalizes to Linux operating systems. If you have a Windows operating system, I recommend using Windows Subsystem for Linux (WSL). Alternatively, you can run this from a <a href=\"https://aws.amazon.com/cloud9/\" target=\"_blank\">Cloud9</a> IDE in your AWS account.</p>\n<p><strong>Step 1: Download the Oberbayern region from <a href=\"http://download.geofabrik.de/\" target=\"_blank\">download.geofabrik.de</a></strong></p>\n<p>Prerequisites:</p>\n<ul>\n<li><a href=\"https://curl.se/\" target=\"_blank\">curl</a></li>\n</ul>\n<p>Bash</p>\n<pre><code class=\"lang-\">curl https://download.geofabrik.de/europe/germany/bayern/oberbayern-latest.osm.pbf -o oberbayern-latest.osm.pbf\n</code></pre>\n<p><strong>Step 2: Install osmium-tool</strong></p>\n<p>Prerequisites:</p>\n<ul>\n<li><a href=\"https://brew.sh/\" target=\"_blank\">Homebrew</a></li>\n</ul>\n<p>Bash</p>\n<pre><code class=\"lang-\">brew install osmium-tool\n</code></pre>\n<p><strong>Step 3: Extract Munich from the Oberbayern map</strong></p>\n<p>Bash</p>\n<pre><code class=\"lang-\">osmium extract -b "11.5137,48.1830,11.6489,48.0891" oberbayern-latest.osm.pbf -o ./munich.osm.pbf -s "complete_ways" --overwrite\n</code></pre>\n<p><strong>Step 4: Pre-process the OSM map for the vehicle routing</strong></p>\n<p>Prerequisites:</p>\n<ul>\n<li><a href=\"https://www.docker.com/\" target=\"_blank\">Docker</a></li>\n</ul>\n<p>Bash</p>\n<pre><code class=\"lang-\">docker run -t -v $(pwd):/data osrm/osrm-backend:v5.25.0 osrm-extract -p /opt/car.lua /data/munich.osm.pbf\ndocker run -t -v $(pwd):/data osrm/osrm-backend:v5.25.0 osrm-contract /data/munich.osrm\n</code></pre>\n<p><strong>Step 5: Install the trip-simulator</strong></p>\n<p>Prerequisites:</p>\n<ul>\n<li><a href=\"https://nodejs.org/en/\" target=\"_blank\">Node.js</a></li>\n</ul>\n<p>Bash</p>\n<pre><code class=\"lang-\">npm install -g trip-simulator\n</code></pre>\n<p><strong>Step 6: Run a 10 car, 30 minute car simulation</strong></p>\n<p>Bash</p>\n<pre><code class=\"lang-\">trip-simulator \\\n --config car \\\n --pbf munich.osm.pbf \\\n --graph munich.osrm \\\n --agents 10 \\\n --start 1563122921000 \\\n --seconds 1800 \\\n --traces ./traces.json \\\n --probes ./probes.json \\\n --changes ./changes.json \\\n --trips ./trips.json\n</code></pre>\n<p><em>The probes.json file is the file containing the GPS probes we will playback to Amazon Location Service.</em></p>\n<h4><a id=\"Part_2_Playback_trips_to_Amazon_Location_Service_110\"></a><strong>Part 2: Playback trips to Amazon Location Service</strong></h4>\n<p>Now that you have simulated trips in the probes.json file, you can play them back in the tracker created earlier. For this, you must write only a few lines of Python code. The following steps have been neatly separated into a series of functions that yield an iterator.</p>\n<p>Prerequisites:</p>\n<ul>\n<li><a href=\"https://www.python.org/downloads/\" target=\"_blank\">Python</a> 3.7</li>\n<li><a href=\"https://boto3.amazonaws.com/v1/documentation/api/latest/index.html\" target=\"_blank\">boto3</a></li>\n</ul>\n<p><strong>Step 1: Load the probes.json file and yield each line</strong></p>\n<p>Python</p>\n<pre><code class=\"lang-\">import json\nimport time\nimport datetime\nimport boto3\n\ndef iter_probes_file(probes_file_name="probes.json"):\n """Iterates a file line by line and yields each individual line."""\n with open(probes_file_name) as probes_file:\n while True:\n line = probes_file.readline()\n if not line:\n break\n yield line\n</code></pre>\n<p><strong>Step 2: Parse the probe on each line</strong><br />\nTo process the probes, you parse the JSON on each line and extract the data relevant for the playback. Note that the coordinates order is longitude, latitude in the probes.json file. This is the same order that the Location Service expects.</p>\n<p>Python</p>\n<pre><code class=\"lang-\">def parse_probes_trip_simulator(probes_iter):\n """Parses a file witch contains JSON document, one per line.\n Each line contains exactly one GPS probe. Example:\n {"properties":{"id":"RQQ-7869","time":1563123002000,"status":"idling"},"geometry":{"type":"Point","coordinates":[-86.73903753135207,36.20418779626351]}}\n The function returns the tuple (id,time,status,coordinates=(lon,lat))\n """\n for line in probes_iter:\n probe = json.loads(line)\n props = probe["properties"]\n geometry = probe["geometry"]\n yield props["id"], props["time"], props["status"], geometry["coordinates"]\n</code></pre>\n<p><strong>Step 3: Update probe record time</strong></p>\n<p>The probes represent historical data. Therefore, when you playback you will need to normalize the probes recorded time to sync with the time you send the request in order to achieve the effect of vehicles moving in real-time.</p>\n<p>This example is a single threaded playback. If the simulated playback lags behind the probe data timing, then you will be provided a warning through the code detecting the lag and outputting a warning.</p>\n<p>The SharedStreets trip-simulator generates one probe per second. This frequency is too high for most applications, and in real-world applications you will often see frequencies of 15 to 60 seconds or even less. You must decide if you want to add another iterator for sub-sampling the data.</p>\n<p>Python</p>\n<pre><code class=\"lang-\">def update_probe_record_time(probes_iter):\n """\n Modify all timestamps to be relative to the time this function was called.\n I.e. all timestamps will be equally spaced from each other but in the future.\n """\n new_simulation_start_time_utc_ms = datetime.datetime.now().timestamp() * 1000\n simulation_start_time_ms = None\n time_delta_recording_ms = None\n for i, (_id, time_ms, status, coordinates) in enumerate(probes_iter):\n if time_delta_recording_ms is None:\n time_delta_recording_ms = new_simulation_start_time_utc_ms - time_ms\n simulation_start_time_ms = time_ms\n simulation_lag_sec = (\n (\n datetime.datetime.now().timestamp() * 1000\n - new_simulation_start_time_utc_ms\n )\n - (simulation_start_time_ms - time_ms)\n ) / 1000\n if simulation_lag_sec > 2.0 and i % 10 == 0:\n print(f"Playback lags behind by {simulation_lag_sec} seconds.")\n time_ms += time_delta_recording_ms\n yield _id, time_ms, status, coordinates\n</code></pre>\n<p><strong>Step 4: Playback probes</strong><br />\nIn this step, pack the probes into small batches and introduce the timing element into the simulation playback. The reason for placing them in batches is explained below in step 6.</p>\n<p>Python</p>\n<pre><code class=\"lang-\">def sleep(time_elapsed_in_batch_sec, last_sleep_time_sec):\n sleep_time = max(\n 0.0,\n time_elapsed_in_batch_sec\n - (datetime.datetime.now().timestamp() - last_sleep_time_sec),\n )\n time.sleep(sleep_time)\n if sleep_time > 0.0:\n last_sleep_time_sec = datetime.datetime.now().timestamp()\n return last_sleep_time_sec\n\n\ndef playback_probes(\n probes_iter,\n batch_size=10,\n batch_window_size_sec=2.0,\n):\n """\n Replays the probes in live mode.\n The function assumes, that the probes returned by probes_iter are sorted\n in ascending order with respect to the probe timestamp.\n It will either yield batches of size 10 or smaller batches if the timeout is reached.\n """\n last_probe_record_time_sec = None\n time_elapsed_in_batch_sec = 0\n last_sleep_time_sec = datetime.datetime.now().timestamp()\n batch = []\n # Creates two second windows and puts all the probes falling into\n # those windows into a batch. If the max. batch size is reached it will yield early.\n for _id, time_ms, status, coordinates in probes_iter:\n probe_record_time_sec = time_ms / 1000\n if last_probe_record_time_sec is None:\n last_probe_record_time_sec = probe_record_time_sec\n time_to_next_probe_sec = probe_record_time_sec - last_probe_record_time_sec\n if (time_elapsed_in_batch_sec + time_to_next_probe_sec) > batch_window_size_sec:\n last_sleep_time_sec = sleep(time_elapsed_in_batch_sec, last_sleep_time_sec)\n yield batch\n batch = []\n time_elapsed_in_batch_sec = 0\n time_elapsed_in_batch_sec += time_to_next_probe_sec\n batch.append((_id, time_ms, status, coordinates))\n if len(batch) == batch_size:\n last_sleep_time_sec = sleep(time_elapsed_in_batch_sec, last_sleep_time_sec)\n yield batch\n batch = []\n time_elapsed_in_batch_sec = 0\n last_probe_record_time_sec = probe_record_time_sec\n if len(batch) > 0:\n last_sleep_time_sec = sleep(time_elapsed_in_batch_sec, last_sleep_time_sec)\n yield batch\n</code></pre>\n<p><strong>Step 5: Create the updates for the tracker</strong></p>\n<p>Python</p>\n<pre><code class=\"lang-\">LOCAL_TIMEZONE = (\n datetime.datetime.now(datetime.timezone(datetime.timedelta(0))).astimezone().tzinfo\n)\n\ndef convert_to_tracker_updates(probes_batch_iter):\n """\n Converts batches of probes in the format (id,time_ms,state,coordinates=(lon,lat))\n into batches ready for upload to the tracker.\n """\n for batch in probes_batch_iter:\n updates = []\n for _id, time_ms, _, coordinates in batch:\n # The boto3 location service client expects a datetime object for sample time\n dt = datetime.datetime.fromtimestamp(time_ms / 1000, LOCAL_TIMEZONE)\n updates.append({"DeviceId": _id, "Position": coordinates, "SampleTime": dt})\n yield updates\n</code></pre>\n<p><strong>Step 6: Send the updates to the tracker</strong><br />\nIn the update_tracker function, you use the batch_update_device_position function of the Amazon Location Service Tracker API. This lets you send batches of up to 10 location updates to the tracker in one request. Batching updates is much more cost-effective than sending one-by-one. You pay for each call to batch_update_device_position. Therefore, batching can lead to a 10x cost reduction.</p>\n<p>Python</p>\n<pre><code class=\"lang-\">def update_tracker(batch_iter, location_client, tracker_name):\n """\n Reads tracker updates from an iterator and uploads them to the tracker.\n """\n for update in batch_iter:\n response = location_client.batch_update_device_position(\n TrackerName=tracker_name, Updates=update\n )\n if "Errors" in response and response["Errors"]:\n for error in response["Errors"]:\n print(error["Error"]["Message"])\n</code></pre>\n<p><strong>Step 7: Putting it all together</strong><br />\nThe follow code is the main section that glues every part together. When using this, make sure to replace the variables probes_file_name and tracker_name with the actual probes file location and the name of the tracker created earlier.</p>\n<p>Python</p>\n<pre><code class=\"lang-\">if __name__ == "__main__":\n location_client = boto3.client("location")\n probes_file_name = "probes.json"\n tracker_name = "my-tracker"\n iterator = iter_probes_file(probes_file_name)\n iterator = parse_probes_trip_simulator(iterator)\n iterator = update_probe_record_time(iterator)\n iterator = playback_probes(iterator)\n iterator = convert_to_tracker_updates(iterator)\n update_tracker(\n iterator, location_client=location_client, tracker_name=tracker_name\n )\n</code></pre>\n<p>Paste all of the code listed in steps 1 to 7 into a file called trip_playback.py, then execute</p>\n<p>Bash</p>\n<pre><code class=\"lang-\">python3 trip_playback.py\n</code></pre>\n<p><em>This will start the playback process.</em></p>\n<p><strong>Step 8: (Optional) Tracking a device’s position updates</strong><br />\nOnce the playback is running, verify that the updates are actually written to the tracker repeatedly querying the tracker for updates for a single device. Here, you will use the get_device_position function of the Amazon Location Service Tracker API to receive the last known device position.</p>\n<p>Python</p>\n<pre><code class=\"lang-\">import boto3\nimport time\n\ndef get_last_vehicle_position_from_tracker(\n device_id, tracker_name="your-tracker", client=boto3.client("location")\n):\n response = client.get_device_position(DeviceId=device_id, TrackerName=tracker_name)\n if response["ResponseMetadata"]["HTTPStatusCode"] != 200:\n print(str(response))\n else:\n lon = response["Position"][0]\n lat = response["Position"][1]\n return lon, lat, response["SampleTime"]\n \nif __name__ == "__main__": \n device_id = "my-device" \n tracker_name = "my-tracker"\n while True:\n lon, lat, sample_time = get_last_vehicle_position_from_tracker(\n device_id=device_id, tracker_name=tracker_name\n )\n print(f"{lon}, {lat}, {sample_time}")\n time.sleep(10)\n</code></pre>\n<p>In the example above, you must replace the tracker_name with the name of the tracker created earlier and the device_id with the ID of one of the simulation vehicles. You can find the vehicle IDs in the probes.json file created by the SharedStreets trip-simulator. If you run the above code, then you should see the following output.</p>\n<p><img src=\"https://dev-media.amazoncloud.cn/2679df2e7e534e55889eec68fda62590_image.png\" alt=\"image.png\" /></p>\n<h3><a id=\"AWS_IoT_Device_Simulator_340\"></a><strong>AWS IoT Device Simulator</strong></h3>\n<p>As an alternative, if you are familiar with AWS IoT, AWS has its own vehicle simulator that is part of the <a href=\"https://aws.amazon.com/solutions/implementations/iot-device-simulator/\" target=\"_blank\">IoT Device Simulator</a> solution. It lets you simulate a vehicle fleet moving on a road network. This has been described <a href=\"https://aws.amazon.com/solutions/implementations/iot-device-simulator/\" target=\"_blank\">here</a>. The simulator sends the location data to an <a href=\"https://aws.amazon.com/iot/\" target=\"_blank\">Amazon IoT</a> endpoint. The Amazon Location Service <a href=\"https://docs.aws.amazon.com/location/latest/developerguide/tracking-using-mqtt.html\" target=\"_blank\">Developer Guide</a> shows how to write and set-up a Lambda function to connect the IoT topic to the tracker.</p>\n<p>The AWS IoT Device Simulator has a GUI and is a good choice for simulating a small number of vehicles. The drawback is that only a few trips are pre-packaged with the simulator and changing them is somewhat complicated. The SharedStreets Trip-simulator has much more flexibility, allowing simulations of fleets made up of a larger number of vehicles, but it has no GUI for controlling the playback or simulation.</p>\n<h3><a id=\"Cleanup_345\"></a><strong>Cleanup</strong></h3>\n<p>You’ve created a Location Service Tracker resource. It does not incur any charges if it isn’t used. If you want to delete it, you can do so on the Amazon Location Service Tracker console.</p>\n<h3><a id=\"Conclusion_348\"></a><strong>Conclusion</strong></h3>\n<p>This blog showed you how to use an open-source project and open-source data to generate simulated trips, as well as how to play those trips back to the Amazon Location Service Tracker. Furthermore, you have access to the AWS IoT Device Simulator, which can also be used for simulating vehicles.</p>\n<p>Give it a try and tell us how you test your location-based applications in the comments.</p>\n<h3><a id=\"About_the_authors_353\"></a><strong>About the authors</strong></h3>\n<p><strong>Florian Seidel</strong><br />\nFlorian is a Solutions Architect in the EMEA Automotive Team at AWS. He has worked on location based services in the automotive industry for the last three years and has many years of experience in software engineering and software architecture.</p>\n<p><strong>Aaron Sempf</strong><br />\nAaron is a Senior Partner Solutions Architect, in the Global Systems Integrators team. When not working with AWS GSI partners, he can be found coding prototypes for autonomous robots, IoT devices, and distributed solutions.</p>\n"}
Simulated location data with Amazon Location Service
海外精选

海外精选的内容汇集了全球优质的亚马逊云科技相关技术内容。同时,内容中提到的“AWS”
是 “Amazon Web Services” 的缩写,在此网站不作为商标展示。

 0
0 0
0亚马逊云科技解决方案 基于行业客户应用场景及技术领域的解决方案
联系亚马逊云科技专家
亚马逊云科技解决方案
基于行业客户应用场景及技术领域的解决方案
联系专家

0
目录

 分享
分享 点赞
点赞 收藏
收藏 目录
目录立即注册,开启您的免费套餐
立即关注

亚马逊云开发者
公众号

User Group
公众号

亚马逊云科技
官方小程序
“AWS” 是 “Amazon Web Services” 的缩写,在此网站不作为商标展示。
立即关注
亚马逊云开发者
公众号
User Group
公众号
亚马逊云科技
官方小程序
“AWS” 是 “Amazon Web Services” 的缩写,在此网站不作为商标展示。
关于我们 
更多资源
开发者工具
更多支持
立即关注
亚马逊云开发者
公众号
User Group
公众号
亚马逊云科技
官方小程序
“AWS” 是 “Amazon Web Services” 的缩写,在此网站不作为商标展示。
